Table of Figures and Table of Contents switches
Also, Word offers many useful features you can use in the Table of Contents and Table of Figures by adding and specifying switches. Below you can see an example for some switches.
Display the TOC field
The TOC field looks like this:
To display the field instead of the existing Table of Contents or Table of Figures, do the following:
1. Select all lines of the Table of Contents or Table of Figures, including the last, empty one (see how to select the Table of Contents).
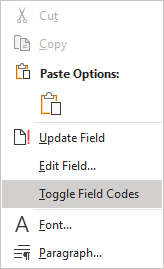
2. Right-click and select Toggle Field Codes in the popup menu:
Note: If you did not select all lines for the Table, you see something like this ![]() . Select them again and do Toggle Field Codes again. Word displays the TOC field instead of the Table with all used switches.
. Select them again and do Toggle Field Codes again. Word displays the TOC field instead of the Table with all used switches.
Switches that include or exclude the entries
Specify Heading levels
\o Levels – specifies the Heading levels to include in the Table of Contents. By default, Word includes Heading 1, Heading 2, and Heading 3 levels:
Note: The Levels can be used with or without quotes.
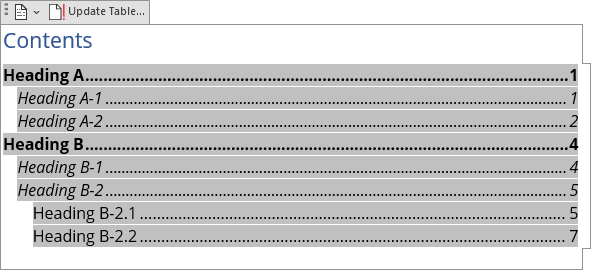
You can specify other levels. For example, the above Table of Contents includes only Heading 2 and Heading 3:
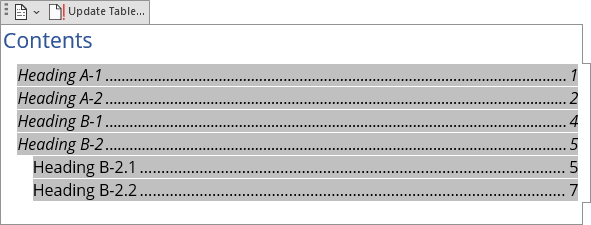
Note: You can not use the non-continuous range such as “1-2,4”. See the \t switch to use other styles.
Include custom, non-heading, or non-continuous heading styles
\t "Style, Level, Style, Level, ..." – includes the non-heading, custom styles in the specified levels. You also can include non-continuous Headings.
- Styles should be referenced by their names,
- The entry-level in the Table of Contents for the style follows the style name and defines the level number 1, 2, ...
Be careful! The styles and levels should be separated by the comma (,) or semicolon (;), depending on which character is specified as the list separator in your operating system. All styles and levels should be in the quotes.
Example 1: The Table of Contents includes:
- The Custom style in level 2,
- The Heading 5 style in level 3:

Note: You can use both the \o switch and the \t switches to create a Table of Contents from the Heading and non-heading styles. For example, the Table of Contents includes the Heading 1, Heading 5, and Custom styles:
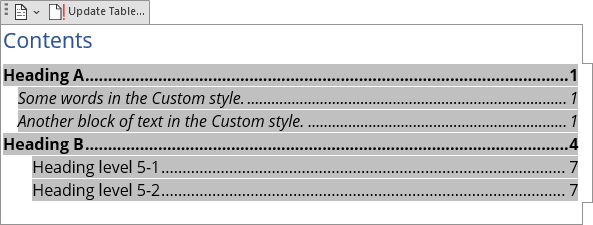
Example 2: The Table of Figures includes all captions in a Word document:

Include captions created in the Caption dialog (with numbers)
\c Identifier – includes captions of figures, tables, charts, or other visual objects specified by the Caption functionality (see figure captions, table captions, etc.).
For example, the Table of Figures includes all table captions in the Word document:
Note: The Identifier can be used with or without quotes. So, ![]() and
and ![]() both work correctly.
both work correctly.

Notes:
- To create the Table of Figures with different caption types, use the \t switch for the Caption style (or any other style).
- Use the \a switch to create a Table of Figures without labels and numbers.
Include captions created by the Caption feature without labels and numbers
\a Identifier – includes captions of figures, tables, charts, or other visual objects that are created in the Caption dialog but omits caption labels and numbers (see figure captions, table captions, etc.).
For example, the Table of Figures includes all table titles captioned using the Caption dialog without labels and numbers:
Note: The Identifier can be used with or without quotes.

Notes:
- To create the Table of Figures with different caption types, use the \t switch for the Caption style (or any other style).
- Use the \c switch to create a Table of Figures with labels and numbers.
Include the Table of Contents Entry
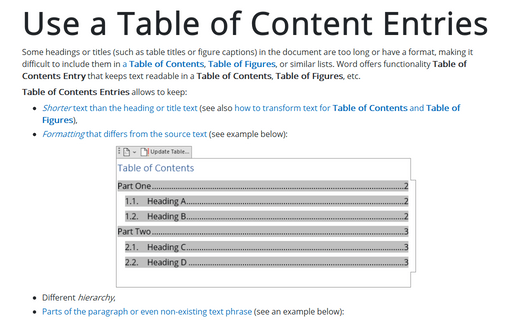
\f Entry_Identifier – includes the specified Table of Contents Entry (see how to create Table Entries).
Note: When you select the Table Entry check box:
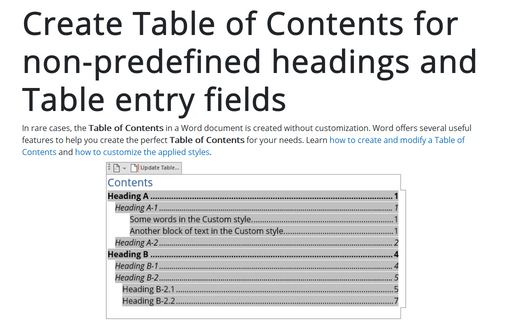
- In the Table of Contents dialog box (see how to create Table of Contents for non-predefined headings and Table entry fields for more details), Word includes only the switch \f into the TOC field. So, you need to specify the Entry Identifier (see the feature of TOC).
- In the Table of Figures dialog box (see how to format Table of Figures and List of Tables for more details), Word offers to specify the Entry Identifier right in that dialog box. You don't need to change anything in the TOC field.
Example 1: There are TC fields in a document (see Add parts of the paragraph or even non-existing phrase to the Table of Contents for more details):
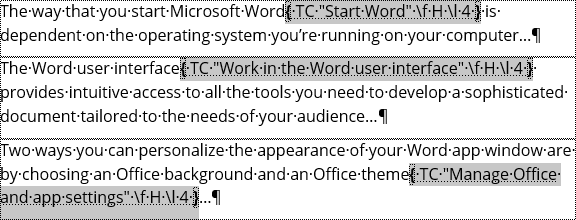
The Table of Contents includes the Table Entries specified as H:

Example 2: There are TC fields associated with the table titles in a document (see Add two- or three- lines headings, titles, captions in the Table of Contents or Table of Figures for more details):

***

The Table of Figures includes the Table Entries specified as T:

Include the Table of Contents Entries with specified levels
\l Levels – includes the specified levels of the Table of Contents Entry (see how to create Table Entries).
For example, if the text contains several different TC fields:
- With level 1 (see Add formatted titles to display in the Table of Contents for more details):

***

- With level 4 (see Add parts of the paragraph or even non-existing phrase to the Table of Contents for more details):

The Table of Contents includes the Table Entries specified as H with levels 1-2:

The Table of Contents includes the Table Entries specified as H with level 4:

Limit the Table of Contents entries by some parts of the document
\b BookmarkName – collects entries only from the part of the document marked by the specified Bookmark.
For example, using the \b switch, you can create multiple Table of Contents in one document:

See how to create multiple Tables of Contents in one document for more details.
Switches for formatting
Hide the page numbers for some levels
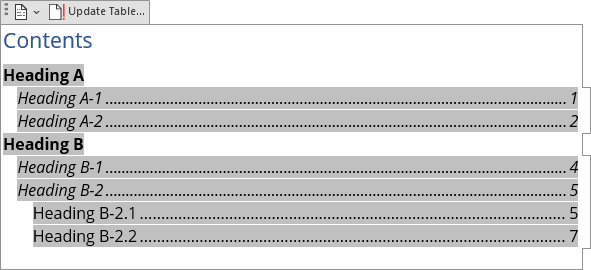
\n Levels – hides page numbers (or omits page numbers) from the Table of Contents for the specified levels.
Example 1: The Table of Contents without page numbers (see Example 1 in Include the Table of Contents Entry above):

Example 2: The Table of Contents with skipped page numbers for level 1:
Use entries as hyperlinks
\h - inserts entries as hyperlinks.
The entries of the Table of Contents or Table of figures are not displayed as hyperlinks, but they can be clicked to move to the defined heading, caption, or title. By default, you need to click Ctrl+Click to follow to link. You can customize your Word to use just Click to follow to link.
Without that switch, you can't link to the heading from the Table of Contents or Table of Figures.
