Use a Table of Content Entries
Table of Contents Entries allows to keep:
- Shorter text than the heading or title text (see also how to transform text for Table of Contents and Table of Figures),
- Formatting that differs from the source text (see example below):
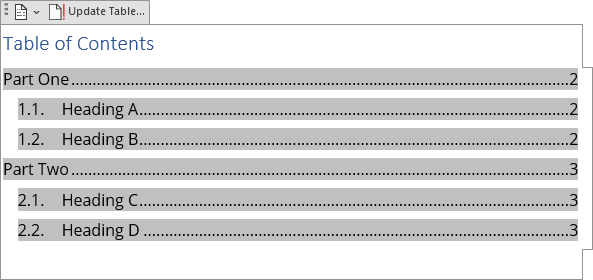
- Different hierarchy,
- Parts of the paragraph or even non-existing text phrase (see an example below):

- Text that is not a heading or title at all.
A Table of Contents Entry defines the text and page numbers.
Create a Table Entry using the Mark Entry button
To create a Table Entry, do the following:
1. Position the cursor where you want to insert a Table Entry.
Usually, it should be placed right after the text to be replaced.
Note: You can select the text to be replaced to avoid double typing the text later.
2. Do one of the following:
- Click the Mark Entry in your ribbon or the Quick Access Toolbar:
 or
or

Note: By default, that button is hidden; see how to add it to the ribbon and the Quick Access Toolbar.
- Press Alt+Shift+O.
3. In the Mark Table of Contents Entry dialog box:

- In the Entry field, type or correct the text of the entry (if you selected text, it is displayed),
See examples of inserting additional symbols and formatting in the Entry field below.
- In the Table identifier list, select the identifier.
The letter (typically from A to Z) defines the object type as a caption label. You can create a Table of Contents, Table of Figures using one of these identifiers.
For example, select F for figures, T for tables, etc.
- In the Level field, select the level for the entry like the headings for hierarchical structure in the Table of Contents, Table of Figures, etc.
- Click the Mark button to insert a Table Entry in the document.
- Click the Close button to close the dialog box.
Word turns on the Show/Hide feature to display the non-printing characters in the document (if it is not already turned on) and inserts a TC field in the place of the cursor.
Create a Table Entry using the Field dialog box
1. On the Insert tab, in the Text group, click Quick Parts, and then click Field...:

2. In the Field dialog box:
- In the Field names list, select the TC field (Mark a table of contents entry):

- In the Text entry field, type the text for the Table of Contents or Table of Figures for this entry,
- Select the check boxes you need:
- TC entry in doc with multiple tables allows using the identifier (the letter defines the type of the object as a caption label).
- Outline level specifies the level as a headings level.
- Suppresses page number adds the page number for the entry.
- Click OK.
Note: To specify the identifier, modify a Table Entry using switches.
Create a Table Entry using the TC field switches
The TC field looks like this:
1. Create a field by pressing Ctrl+F9:
2. Type TC to specify the Mark a table of contents entry field.
3. Type the text in quotes for the Table of Contents or Table of Figures for the new entry. It can contain other fields, some formatting, non-printable symbols, etc.
4. Type switches:
- \f with the following letter identifies the Table identifier,
- \l with the following number identifies the Level,
- \n omit the page number for the entry.
Use the Table Entry in the Table of Contents
By default, after selecting the Table Entry fields in the Table of Contents dialog box (see how to create and modify a Table of Contents), Word doesn't specify the identifier of the Table Entry. So, after creating a Table of Contents, you need to make the additional steps:
1. Select all Table of Contents lines, including the last, empty one.
2. Right-click and select Toggle Field Codes in the popup menu:
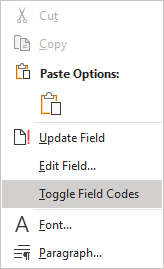
Note: If you see something like this ![]() , not all lines were selected for the Table of Contents. Select them again and repeat this step.
, not all lines were selected for the Table of Contents. Select them again and repeat this step.
3. In the TOC field, after the \f switch, specify the Table Entry identifier. For example, H.
4. Right-click in the TOC field and select Update Field... in the popup menu:
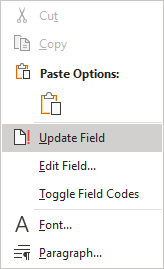
Word updates the Table of Contents according to your choices.
Examples
Example 1: Add parts of the paragraph or even non-existing phrase to the Table of Contents
This example solves the problem if the text should be included in the Table of Contents or Table of Figures:
- located in the middle of a paragraph (see how to transform text if you need to include the first few words of a paragraph), or
- you need to rephrase the heading, title, or caption.
To add the parts of the paragraphs or non-existing phrases, do the following:
1. Position the cursor where you want to insert a Table Entry.
2. Create the TC field with the text for the entry and the following switches:
- \f H to identify these blocks of texts as Headings
- \l 4 to specify the blocks of texts as Heading level 4 (optionally)
- \n to hide page numbers (optionally):
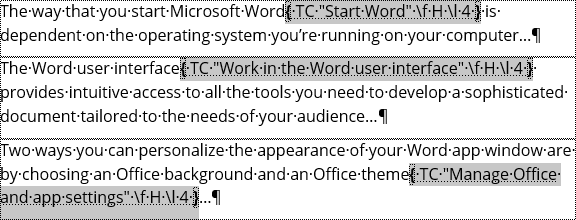
3. Create a Table of Contents or Table of Figures with the Table Entries.
4. Make additional steps to specify the identifier of the Table Entry:

Note: The Table of Contents code looks like: ![]() (see Table of Figures and Table of Contents switches for more details).
(see Table of Figures and Table of Contents switches for more details).
See also how to include multiply Tables of Contents in one Word document.
Example 2: Add two- or three- lines headings, titles, captions in the Table of Contents or Table of Figures
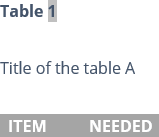
This example solves the problem of a formatted heading, titles, or captions. According to some requirements, the title or caption should be located on the next line from the label and number. In that case, the Table of Figures will contain only labels with numbers (Table 1, Table 2, etc.) without titles. E.g.:
***

To include the several lines to the Table of Contents or Table of Figures, do the following:
1. Position the cursor where you want to insert a Table Entry. It is recommended to insert it at the end of the heading, title, or caption.
2. Create the TC field with the text for the entry and the following switches:
- \f T to identify these blocks of texts as Tables

***

3. Create a Table of Contents or Table of Figures with the Table Entries:

Notes:
- The Table of Figures code looks like this:
 (see Table of Figures and Table of Contents switches for more details).
 - You can solve that also using the transformation of the headings, captions, and titles.
Example 3: Add formatted titles to display in the Table of Contents
This example solves the problem of a formatted heading with two or more lines formatted in different styles. E.g.:
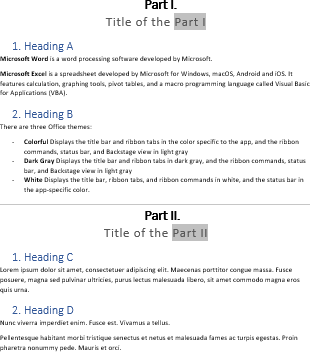
To add the formatted blocks of texts to the Table of Contents, do the following:
1. Position the cursor where you want to insert a Table Entry (usually at the end of the last line).
2. Create the TC field with the text for the entry and the following switches:
- \f H to identify these blocks of texts as Headings
- \l 1 to specify the blocks of texts as Heading level 1:
***
Note: To include the correct number in the Table Entry, use the Bookmarks.
3. Create a Table of Contents or Table of Figures with the Table Entries with the following switches:
- \f H to identify Table Entries,
- \ο “1-2” to include the Heading 1 and Heading 2 styles
4. Make additional steps to specify the identifier of the Table Entry:
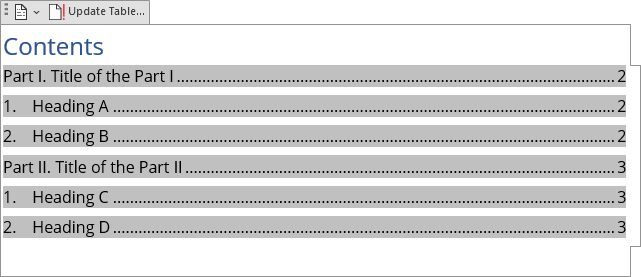
Notes:
- The Table of Contents code looks like this:

See Table of Figures and Table of Contents switches for more details.
- You can solve that also using the transformation of the headings, captions, and titles.
Example 4: Add the replacement text instead of text in the heading, caption, or title
You can add the TC fields to every heading if you need to display them in words instead of their numeric format:

1. Position the cursor where you want to insert a Table Entry (usually at the end of the line).
2. Create the TC field with the text for the entry and the following switches:
- \f H to identify these blocks of texts as Headings
- \l 1 to specify the blocks of texts as Heading level 1:
***
3. Create a Table of Contents with the Table Entries with the following switches:
- \f H to identify Table Entries,
- \ο “2-3” to include the Heading 2 and Heading 3 styles and exclude the Heading 1
4. Make additional steps to specify the identifier of the Table Entry:

Note: The Table of Contents code looks like this:

See Table of Figures and Table of Contents switches for more details.
