Add an attachment in Outlook for Windows
- The type of file you attach is important because:
- You must be sure that the recipient(s) of the message will be able to open or use it - different software versions can cause errors.
- Many email servers will not accept certain file types, such as videos or compressed ZIP files.
Note: Some file types are blocked from being sent or received in Outlook itself. See Blocked attachments in Outlook for a complete list.
- The size of the attachment (all attachments) should also be considered, as many email servers do not accept large files - see how to reduce the size of image attachments.
Notes:
- Many email servers have strict size limits for incoming and outgoing messages, and your message will not be delivered without any notification. Some corporate servers do not accept attachments at all.
- Instead of sending a copy of a file or picture, you can send a link to a file located on OneDrive, SharePoint, or any other shared location if your recipients can access that location.

Add an attachment
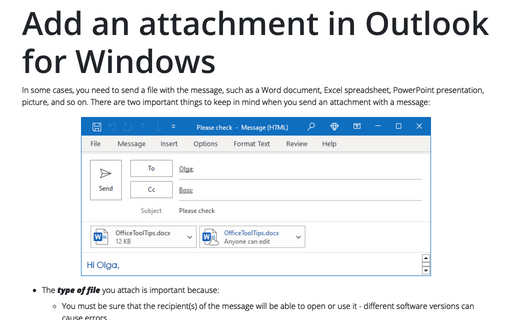
When you attach a file from your computer, Outlook attaches a copy of the file, as shown in the picture above on the left. This way, each message recipient with an attachment receives their own copy of the attached file.
If you select a file from a shared location, a OneDrive folder, or a corporate Web site, such as a SharePoint document library, the cloud icon on the file icon indicates that the attachment is a link to the file, not a copy, as shown in the picture above on the right. All recipients with the appropriate permissions can view or edit the same file.
To add a file as an attachment to the email, in the Message window (in a new message, a reply, or a forwarded message):

- If you use the Simplified ribbon (see more about customizing ribbons):
- On the Insert tab, click the Attach File button:

- On the Message tab, click the Attach File... button (the paper clip icon):

Note: If you don't see it on the ribbon, click the More commands button - three points to the very right of the ribbon buttons:
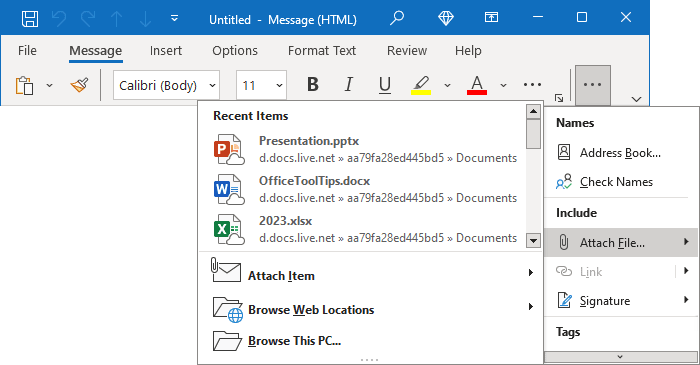
- On the Insert tab, click the Attach File button:
- If you use the Classic ribbon:
- On the Insert tab, in the Include group, click the Attach File button:

- On the Message tab, in the Include group, click the Attach File button:
 or
or
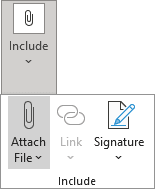
- On the Insert tab, in the Include group, click the Attach File button:
Attach a file or picture from Recent Items
Outlook keeps track of files you've recently worked on and suggests them whenever you choose to attach a file to an email message.
To attach a recently used file, choose it from the Recent Items list:
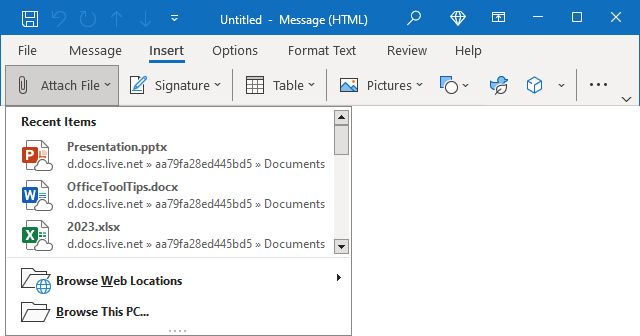
- Recent Items displays the 12 files you recently worked with. These files may be located on your computer, on OneDrive, in a corporate website solution like SharePoint, or in another online document library. Select a file to attach it to your email message.
By default, if you select the online file, Outlook proposes two options on how to attach it (see how to customize Outlook to don't ask this option):
- Share link - instead of attaching a file to your message, Outlook adds the link of the file:
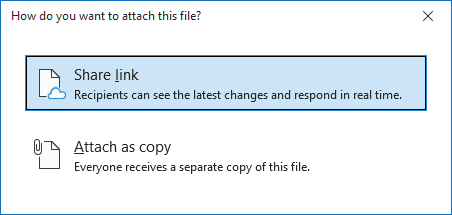
- Attach as copy - Outlook attaches a copy of the file to your message.
Choose how you want to add the file in the attachment by selecting the appropriate option.
Note: Any time before sending a message with attachments, you can change the attachment from a copy of the file to a link to the file and vice versa - see how to modify attachments.
- Share link - instead of attaching a file to your message, Outlook adds the link of the file:
Attach a file or picture from the Web location
- In the Attach File list, click the Browse Web Locations item to open OneDrive, SharePoint, or other places you used or connected:

Select one of the locations to open a new window, and then select the attachment.
For example, from the local OneDrive:

Attach a file or picture from the local PC
- In the Attach File list, click the Browse This PC... item to open the File Explorer window (the Insert File dialog box), where you can select a file on your computer by highlighting it and clicking the Insert button (or double-clicking the file name):

To attach more than one file, hold the Ctrl key while selecting multiple files.
Notes:
- You can attach a file from your desktop or File Explorer to a new email message using the Send To -> Mail recipient command from the popup menu:

You can select multiple files by pressing and holding the Ctrl key to select files located in a row or the Shift key to select files one by one.
Outlook creates a new email message (make sure Outlook is set as your default email client) in which:
- Optionally, the default address in the From field is selected (if you use more than one mailing address),
- The selected file(s) is added to the attachment,
- Added text to the message body:

- You can also drag a file (or multiple files by pressing and holding the Ctrl key) from your desktop or File Explorer into an email message to attach it.
Outlook offers an even faster way to create attachments using drag-and-drop—simply drag the file directly into your Inbox. When you drag a file from File Explorer into your Outlook Inbox, Microsoft Outlook automatically opens a new email message window with the file attached:

- If you add one file, its name will be displayed in the Subject field,
- If you add more than one file, Outlook leaves the Subject field empty.
The drag-and-drop method only works with files on your computer, not files on a file-sharing service.
Attached files
When you attach files:
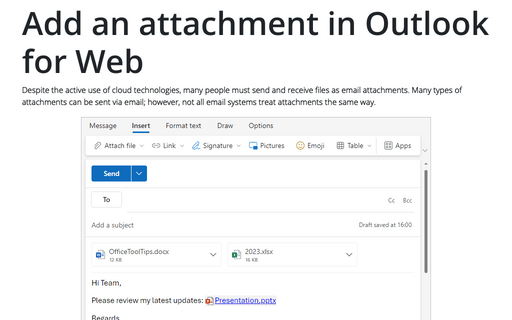
- In the message in HTML format, all attachments will be listed between the subject and the message body in the Attached area:

- In the message in RTF format, the attachment icons can be placed anywhere in the message body using the drag-and-drop method:
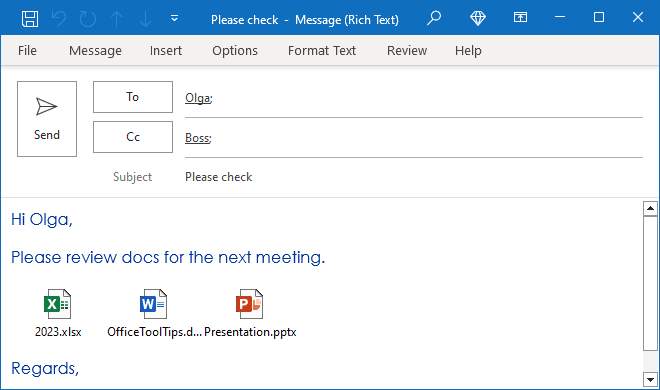
Note: If you change the format of the message with attachments from HTML to RTF format, all the attachments are placed in the body of the message (at the bottom by default), except for links - they are converted to links:
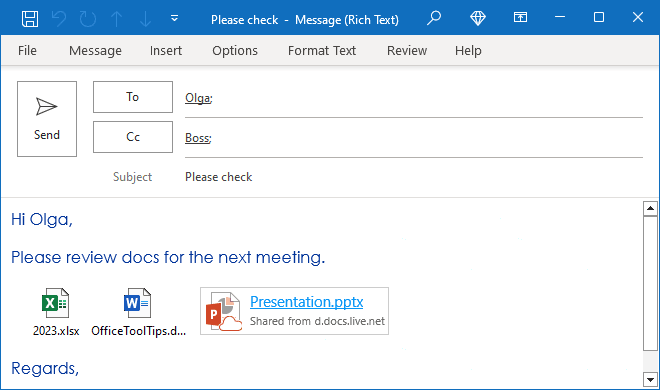
Such links will not return to attachments when the message format is changed back from the RTF to HTML format.
Note: The d.docs.live.net is a file path for documents saved in OneDrive.
- In the message in Plain text format, all attachments will be listed as copies of the files (not links to the files) between the subject and the message body in the Attached area:
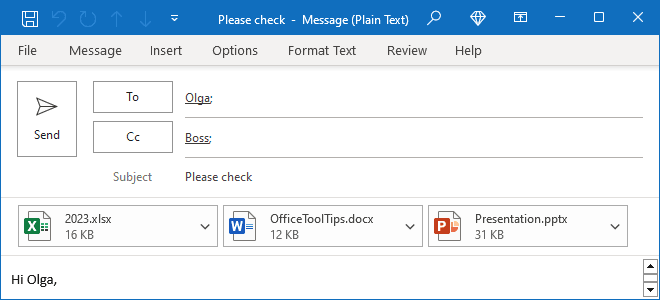
Note: If you change the format of the message with attachments from HTML to Plain Text format:
- Attachments added as copies of files will remain in the Attached area,
- Attachments added as links to the files will be converted into links and placed in the body of the message (at the bottom by default):
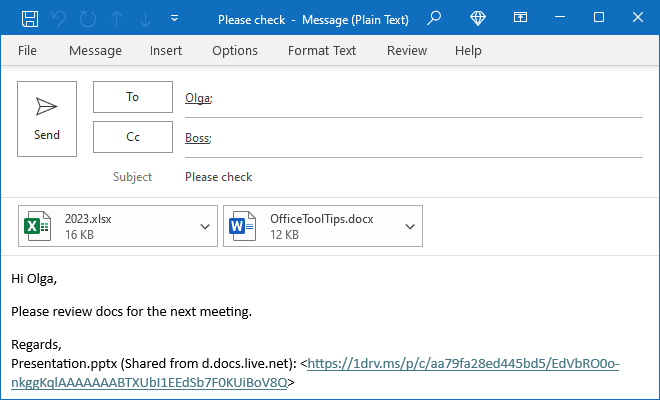
Such links will not return to attachments when the message format is changed back from Plain Text to HTML format.
Note: Links that begin 1drv.ms are the automatically shortened links of OneDrive attachments.
Attach an Outlook Item
In addition to sending files, you can send Outlook items, such as email messages or contacts.
- Business Card - a business card will typically include the contact information of a specific contact or contact group. See more about how to attach a business card to a single message, every new message, and all outgoing messages.
- Calendar - you can send one or more calendar items (event, meeting, or appointment) to another person or several people.
See more about how to send a calendar event as an attachment and share a calendar.
- Outlook Item - select any Outlook folder and choose a specific item to attach.
To attach an Outlook Item, do the following:
1. Open the Insert Item dialog box by doing one of the following:
- If you use the Simplified ribbon (see more about customizing ribbons):
- On the Insert tab, click the Outlook Item button (if you don't see it on the ribbon, click the More commands button - three points to the very right of the ribbon buttons):

- On the Message tab, click the Attach File... button (the paper clip icon), then from the Attach Item list, select Outlook Item:
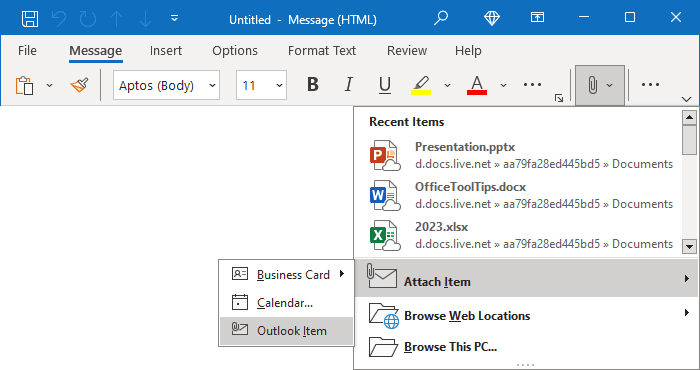
Note: If you don't see it on the ribbon, click the More commands button - three points to the very right of the ribbon buttons:
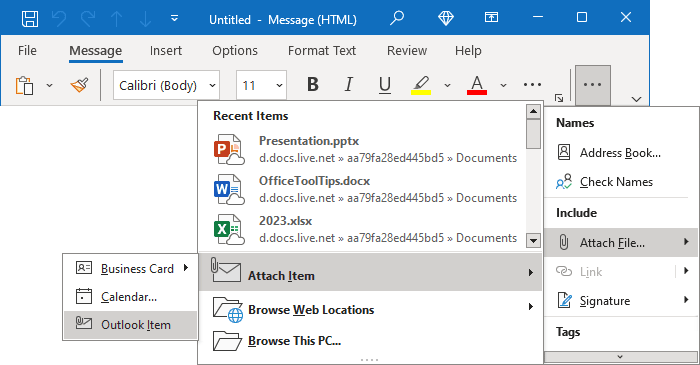
- On the Insert tab, click the Outlook Item button (if you don't see it on the ribbon, click the More commands button - three points to the very right of the ribbon buttons):
- If you use the Classic ribbon:
- On the Insert tab, in the Include group, click the Outlook Item button:

- On the Message tab, in the Include group, click the Attach File button:

- On the Insert tab, in the Include group, click the Outlook Item button:
2. In the Inset Item dialog box:
- In the Look in list, select the account and the folder from which you want to choose the Outlook item.
You can choose:
- Mail folder such as Inbox, Draft, and Archive (see more about the Archive folder),
- Calendar to choose any appointment, meeting, or event,
- Contact to choose a contact from any Address Book,
- Note to select a note you want to send as an attachment,
- Tasks to select a task,
- Etc.
- From the Items list, browse to the Outlook item.
For example, a message:

Note: To select several items, press the Ctrl key and select them.
- In the Insert as group, choose how to insert the selected item(s) as Text only or as an Attachment (by default).
Note: Also, see reply and forward options and how to forward multiple emails as attachments.
Attachment options in Outlook for Windows
Using the Attachment settings in your local Outlook, you can configure how to attach files from a shared online location, such as OneDrive or SharePoint.
The default settings (see above) ask you how you want always to attach the file to the email. You can also specify that any file pasted from an online directory should always be pasted as a copy or a link without further prompting.
To do so, follow the next steps:
1. On the File tab, click Options:

2. In the Outlook Options dialog box, on the General tab, under Attachment options, choose the option you prefer:
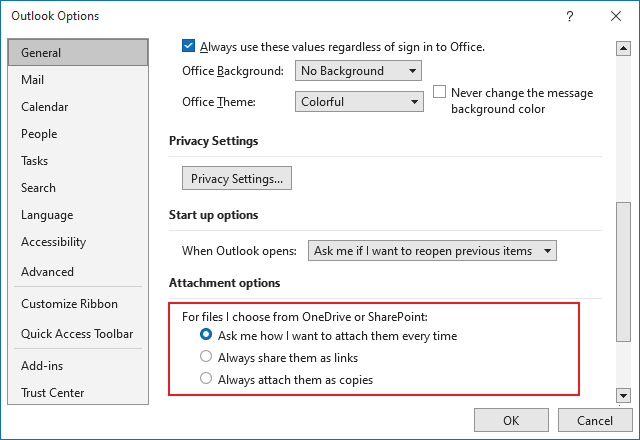
For files, I choose from OneDrive or SharePoint:
- Ask me how I want to attach them every time (default)
- Always share them as links
- Always attach them as copies
