Send email messages in plain text format
- HTML is the default message format in Outlook. This format supports character styles, such as different fonts, their colors, and sizes; paragraph styles, including numbered and bulleted lists; and message backgrounds.
In addition, the HTML format supports embedded tables, images, etc.
Attention! Most, but not all, email applications support the HTML format. If your email client doesn't support HTML, these messages will appear as plain text (see more about how to receive plain text messages).
- The Plain text format does not support the formatting features available in HTML and Rich Text messages, but all email applications support it. All images should be included as attachments.
- Rich text is compatible only with Outlook and Exchange Server, but it supports more paragraph formatting options than HTML, including borders and shading. Outlook automatically converts messages in the Rich text format to HTML when they are sent outside the Exchange network.
In Outlook, you can set up a specific message in your desired format. Some companies use a specific format for all email communications (HTML or Plain Text, and rarely Rich Text). See how to customize Outlook for Windows and Outlook for Web to send all outgoing messages in HTML or Plain Text format.
Send a plain text message
When you create a new email message in Outlook, you can specify the format in which the message should be created. Also, you can change the message format when you reply or forward some messages.
To change the message format, open a message window. Then:
- On the message window in Outlook for Windows, on the Format Text tab, in the Format group, choose the format you need:

It can also look like this (if you use the Classic ribbon instead of Simplified; see more about customizing ribbons):

- Select HTML to create a message with HTML support, such as embedded tables, inserted pictures, and live hyperlinks.
- Select Plain Text to create a message without formatting.
- Select Rich Text to create a message with rich text formatting support, such as embedded objects, borders, and colored text.
- On the message window in Outlook for Web, on the Options tab, click the Switch to plain text button:

If you use the Classic ribbon instead of Simplified (see more about customizing ribbons), on the Options tab, in the Format group, click the Switch to plain text button:

When you click the Plain Text option, Outlook tries to revert the message to the plain text format and displays the warning message (depending on the existing formatting in the message):
- In Outlook for Windows:

or

- In Outlook for Web:

If you want to send this message in plain text format, click the Continue or OK button, respectively. Outlook reverts the message to the plain text format. For example:

Compose and send the message (see different ways for sending messages in Outlook).
Change Email Format to HTML or Plain Text in Outlook for Windows
To specify the default format of outgoing messages in Outlook for Windows, do the following:
1. On the File tab, click the Options button:

2. In the Outlook Options dialog box, open the Mail tab.
Note: You can easily open the Mail tab in the Outlook Options dialog box by right-clicking the Mail icon in the Navigation bar and choosing Options... in the popup menu:
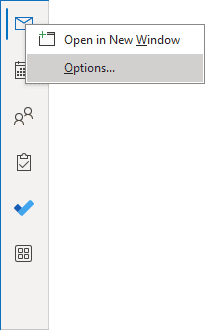 or
or
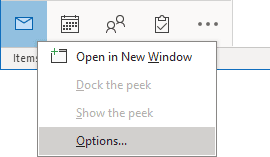
See more about customizing the Navigation bar in Outlook.
3. In the Outlook Options dialog box, on the Mail tab, under Compose messages, from the Compose messages in this format dropdown list, select one of the proposed formats:

4. In the Outlook Options dialog box, click OK to save the changes.
Change Email Format to HTML or Plain Text in Outlook for Web
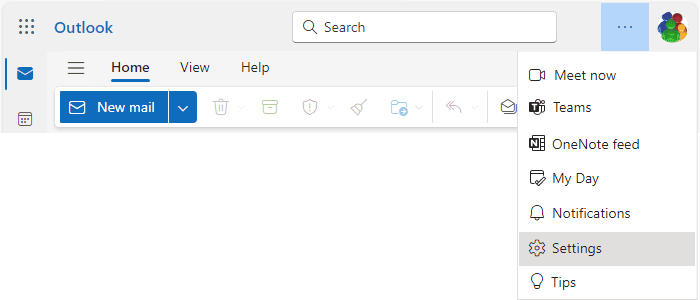
To specify the default format of outgoing messages in Outlook for Web, open the Settings dialog box by doing one of the following:
- Click on the
 Settings button in the upper right corner of the page:

or
- On the View tab, click the Settings button:

In the Settings dialog box, on the Mail tab, in the Compose and reply group:
- Under Message format, select the necessary format from the Compose messages in *** format dropdown list:

- Click the Save button to apply changes.
The new default format is set for all outgoing messages.
