Add an attachment in Outlook for Web
There are two important factors to consider when sending messages with attachments:
- You should agree on the type of file to be attached so that the recipient(s) of the message can open or use it. Problems may arise due to software versions or email servers' restrictions.
Note: Some email systems do not accept certain file types, such as videos or compressed ZIP files. Additionally, some file types are blocked from being sent or received in Outlook itself (see Blocked attachments in Outlook for a complete list).
- When composing an email message, you should also consider the size of the attachment (all attachments) since almost all email servers do not accept large files.
Note: Many email servers have strict size limits for incoming and outgoing messages. For example, Office 365 administrators could set a maximum message size of their choice from 1 MB to 150 MB. Messages exceeding the specified limit will not be delivered without any notification. Some corporate servers do not accept attachments at all.

Add an attachment
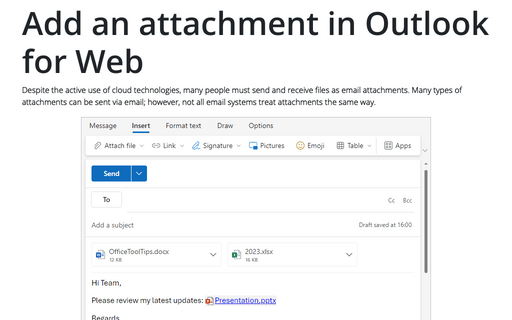
You can attach a file from your computer as a copy of the file (files OfficeToolTips.docx and 2023.xlsx in the example above). Each recipient of a message with an attachment, whether specified in the To, Cc, or Bcc field, receives its own copy of the attached file.
For messages in HTML format, you can also add the attachment as a link to the file, like the file Presentation.pptx in the image above. All recipients with the appropriate permissions can view or edit the same file in real-time.
To attach a file to the email message, in the Message window (in a new message, a reply, or a forwarded message):
- If you use the Simplified ribbon (see more about customizing ribbons):
- On the Insert tab, click the Attach file button (the paper clip icon):

- On the Message tab, click the Attach file button (the paper clip icon):
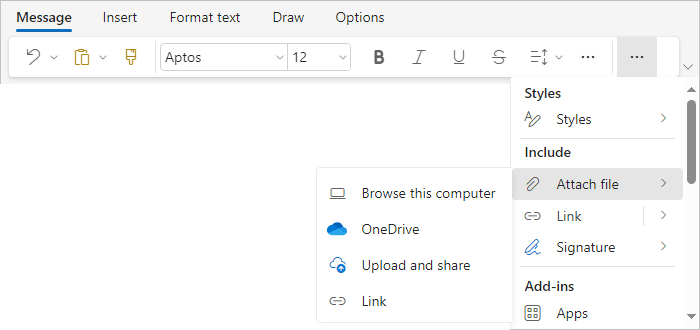
Note: If you don't see this button on the ribbon, click the More commands button - three points to the very right of the ribbon buttons:

- On the Insert tab, click the Attach file button (the paper clip icon):
- If you use the Classic ribbon:
- On the Insert tab, in the Include group, click the Attach File button:

- On the Message tab, in the Include group, click the Attach File button:

- On the Insert tab, in the Include group, click the Attach File button:
Attach a file or picture from Recent Items
Outlook keeps track of files you've recently worked on and suggests them whenever you choose to attach a file to an email message.
To attach a recently used file, choose it from the Suggested files list:
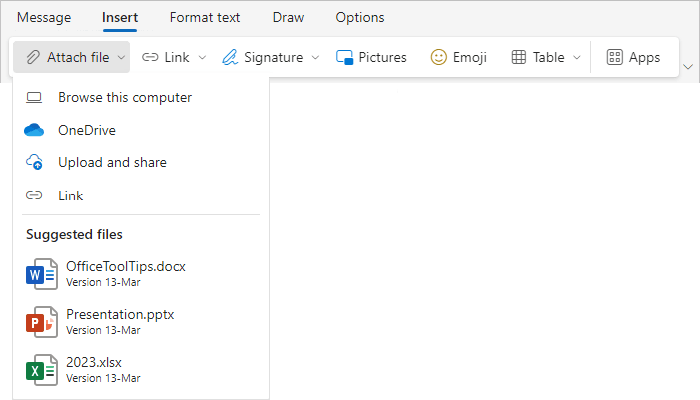
- Suggested files display the 3 Microsoft Office files (Word document, Excel spreadsheet, or PowerPoint presentation) you recently worked with on your computer. Select a file to attach it to your email message.
Note: Any time before sending a message with attachments, you can change the attachment from a copy of the file to a link to the file and vice versa - see how to modify attachments.
Attach a file or picture from the local computer
- In the Attach File list, click the Browse this computer item:

In the File Explorer window (the Open dialog box), select a file on your computer by highlighting it and clicking the Open button (or double-clicking the file name):

To attach more than one file, hold the Ctrl key while selecting multiple files.
Note: You can also drag a file (or multiple files by pressing and holding the Ctrl key) from your desktop or File Explorer into an email message:
- For the message in HTML format, drop a file in the Attach files area to attach it as a copy of the file:

- For the message in Plain Text format, drop a file in the Drop files here area to attach it as a copy of the file:

Outlook adds the file to the Attach area:

For the HTML message, Outlook is also prompted to upload the file to OneDrive (by clicking the Update to OneDrive link) and attach it as a OneDrive file. Click the Dismiss link to hide the message. See more about how to modify the message attachments.
Attach a file or picture from the shared location
- In the Attach file list, click the OneDrive item to open OneDrive, DropBox, Google Drive, SharePoint, or other places you used or connected:

In the opened dialog box, select the file(s) you want to attach from the shared location, then:
- If your message is in HTML format:
- Click the Share link button (by default) to insert a link to the file(s),
- Click the down arrow of the Share link button to select the Attach item to add a copy of the file(s):

Outlook adds the file into the message body:

Outlook also displays the prompt to attach a copy of the file by clicking the Attach instead button. See more about how to modify the message attachments.
Note: If you use Google Drive or DropBox, select Add an account to connect to the service to your Outlook.com account. These accounts must be added before you can attach files stored in these cloud locations:

- If your message is in Plain Text format, click the Next button to insert a copy of the file(s):
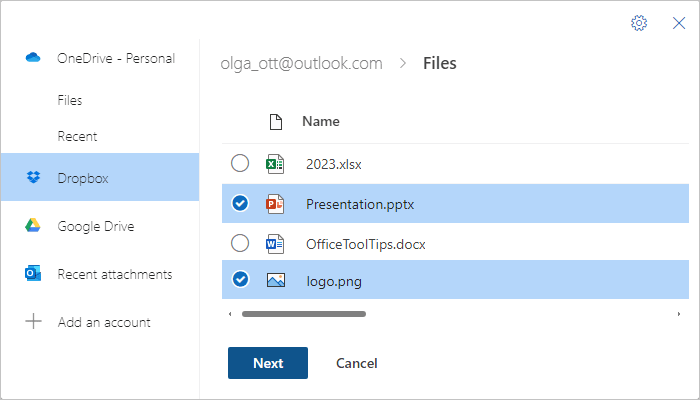
Outlook adds the copy of the file(s) to the Attach area.
Note: You can also drag a file (or multiple files by pressing and holding the Ctrl key) from your desktop or File Explorer into an email message.
- For the message in HTML format, drop a file in the Attach files area to attach it as a link to the file:

- For the message in Plain Text format, drop a file in the Drop files here area to attach it as a copy of the file:

- If your message is in HTML format:
Upload and share in Outlook for Web
Instead of attaching a local file, then uploading it to OneDrive, and replacing a copy of the file with a link to it, Outlook suggests replacing all these actions with one command: Upload and share:
- In the Attach file list, click the Upload and share item (available only for messages in HTML format):

In the Open dialog box, select a file (or several files by pressing and holding the Ctrl key) from your computer by highlighting it and clicking the Open button:

In the Upload to dialog box, click the Upload button to upload the selected file on the displayed OneDrive location and share a link to the file in the message body:
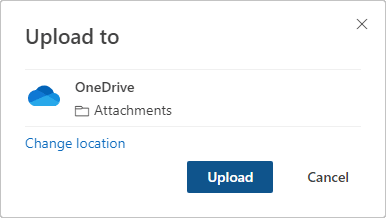
Note: You can change the location by clicking the Change location link, where you can select the needed folder or create a new one by clicking the Create new folder link:
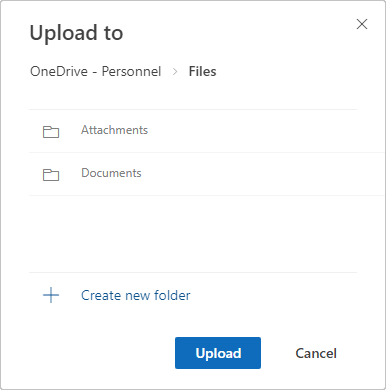
Outlook uploads the selected file(s) to the selected OneDrive folder and inserts a link to the file(s) in the message body.
Attached files
When you attach files:
- In the message in HTML format:
- Attachments added as copies of files will remain in the Attached area,
- Attachments added as links to the files will be added in the body of the message:

- In the message in Plain text format, all attachments will be listed as copies of the files (not links to the files) between the subject and the message body in the Attached area:

Note: If you change the format of the message with attachments from HTML to Plain Text format:
- Attachments added as copies of files will remain in the Attached area,
- Attachments added as links to the files will be removed:

