Add and change the Stationery in Outlook

You can create stationery using the Mail options in Outlook Options for all outgoing messages, for replying and forwarding messages. Keep in mind that you can always change the stationery for individual messages.
Customize the Theme or Stationery for all outgoing messages, replies, and forwards
To customize the theme or stationery for all outgoing messages, for replying or forwarding messages, do the following:
1. On the File tab, click Options:

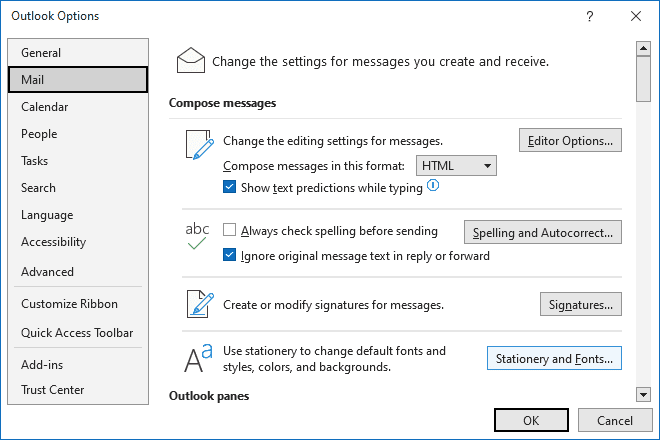
2. In the Outlook Options dialog box, open the Mail tab.
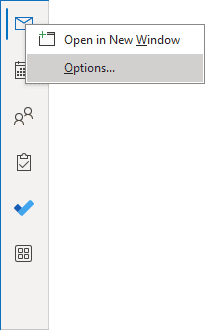
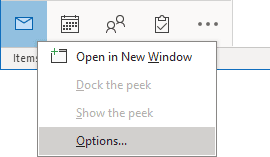
Note: You can easily open the Mail tab in the Outlook Options dialog box by right-clicking the Mail icon in the Navigation bar and choosing Options... in the popup menu:
 or
or

See more about customizing the Navigation bar in Outlook.
3. In the Outlook Options dialog box, on the Mail tab, click the Stationery and Fonts... button:

4. In the Signatures and Stationery dialog box, on the Personal Stationery tab:
- Under Theme or stationery for new HTML e-mail message:
- Click the Theme... button to choose any of the pre-defined stationeries:

If you want to remove stationery used by default, select the (No Theme) stationery.
- Choose the way how to apply the selected theme in the Font dropdown list:

- Use the theme's font (used by default) applies the font format from the selected Theme to all outgoing messages: new messages, replies and forwards.
- Use my font when replying and forwarding messages:
- Applies the font format from the selected Theme to all outgoing new messages,
- Allows configuring and using a custom font format for replies and forwards.
- Always use my fonts allows to configure and use a custom font format for all new messages, replies and forwards but use the other theme elements.
Note: To use any HTML stationery, your message must be in HTML format (see how to customize your messages as HTML or plain text). Additionally, the recipient's email application (browser, email client, etc.) must be able to read this type of formatting (see how to receive some messages as plain text); otherwise, they won't be able to see the stationery or any other formatting on your page.
- Click the Theme... button to choose any of the pre-defined stationeries:
- Under New mail message, click the Font... button (is available if you don't choose the theme or you choose Always use my fonts in the Font dropdown list for the selected theme) to choose the font setting for all new mails.
- Under Replying or forwarding messages:
- Click the Font... button (is available if you don't choose the theme or don't select Use the theme' font in the Font dropdown list for the chosen theme) to choose the font setting for all replying and forwarding messages:

- Select the Mark my comments with checkbox and type or change your preferred name or nickname (this field contains the same mark as the Preface Comments With field of the Mail tab of the Outlook Options dialog box - see more about how to add comments to reply or forward messages):

If the Mark my comments with checkbox is unselected, your comments will not be marked. It can be very useful when you just need to fill out survey questions:

- Select the Pick a new color when replying or forwarding checkbox to have different comment colors for each person. It is useful if you have a lot of comments on the post:

- Click the Font... button (is available if you don't choose the theme or don't select Use the theme' font in the Font dropdown list for the chosen theme) to choose the font setting for all replying and forwarding messages:
- Under Composing and reading plain text messages, click the Font... button to a font setting for all messages that use plain text format (see how to customize your messages as plain text).
5. Click the OK to close the Signatures and Stationery dialog box.
When you create a new message, Outlook uses the stationery you selected as a visual template. See also how to create a new message using a template.
Customize the Stationery for an individual message
To apply a stationery to a single message, do one of the following:
- For the Simplified ribbon (see how to change the Ribbon view), on the Home tab, click the arrow of the New Email button, then from the New Email dropdown list, choose E-mail Message Using list, then click More Stationery...:

- For the Classic ribbon:
1. On the Home tab, in the New group, click New Items:

2. In the New Items drop-down list, select E-mail Message Using, and then click More Stationery:

In the Theme or Stationery dialog box, under Choose a Theme, click the theme or stationery that you want, and then click OK:

Microsoft Outlook creates a new message with the selected stationery.
Note: You can also use Office themes for messages. To apply an Office theme to the current new message, on the Options tab, click the Themes button:

From the Theme gallery, select an existing theme, browse for the Themes, save the current one, or search for more themes on the Microsoft Office Online website.
See more about Themes in Microsoft Office.
See also this tip in French: Comment changer le papier à lettres dans Outlook.


