Creating a multilevel list
To create a multilevel list, follow these steps:
1. Type your list, and then select it.
2. Do one of the following:
- On the Home tab, in the Paragraph group, click the Multilevel List button:

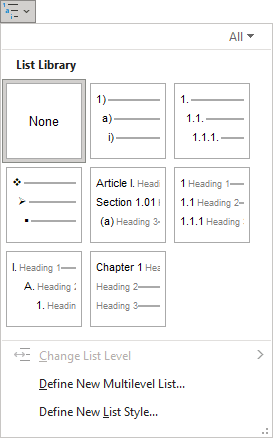
You can find different styles by clicking the arrow next to Multilevel List on the Home tab, in the Paragraph group:

- Create a numbered or bulleted list (see
Creating bulleted lists and
Creating numbered lists) and then:
- Using the keyboard:
- Press Tab - Word indents a level in the list
- Press Shift+Tab - Word outdents a level in the list:
- Using the mouse:
On the Home tab, in the Paragraph group, click the Decrease Indent or Increase Indent button:
 or
or

For example:

Note: If Word does not work as you expect, it doesn't indent and outdent a level of the list, it can be because of this feature is turned off. See Tabulation or next level in the numbered list.
- Using the keyboard:
3. To add additional numbered items to your list, move the insertion point to the end of a line formatted and press Enter:

4. To stop entering items in the list, do one of the following:
- Press Enter as many times as many levels you have in the current position plus one. For
example, for the simple numbered list, you need to press Enter twice; for the example above,
press Enter three times:

- Press Enter and click the Multilevel List button on the Home tab, in the Paragraph group, to turn off the formatting.
See also Customizing multilevel lists and How to turn off automatic creation of bulleted and numbered lists.
Note: More details are available in the Multi-level lists section in the Work with bulleted, numbered and multi-level lists lesson of the Create basic documents free course.
See also this tip in French: Comment créer une liste à plusieurs niveaux.

