How to create numbered headings in Word

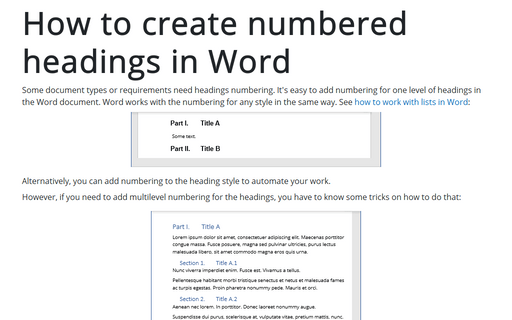
Alternatively, you can add numbering to the heading style to automate your work.
However, if you need to add multilevel numbering for the headings, you have to know some tricks on how to do that:

Add numbering to the heading style
All style changes, such as adding numbering to a heading style, are made in the Modify Style dialog box.
1. To open the Modify Style dialog, do one of the following:
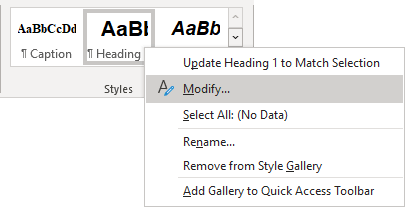
- On the Home tab, in the Styles group, right-click on the style (for example, Heading 1) and choose Modify... in the popup menu:
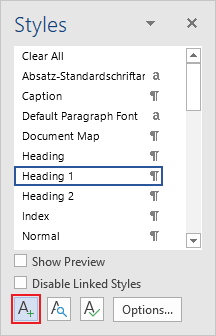
- On the Home tab, in the Styles group, click the dialog box launcher:

On the Styles pane, right-click on the style (for example, Heading 1) and choose Modify... in the popup menu:
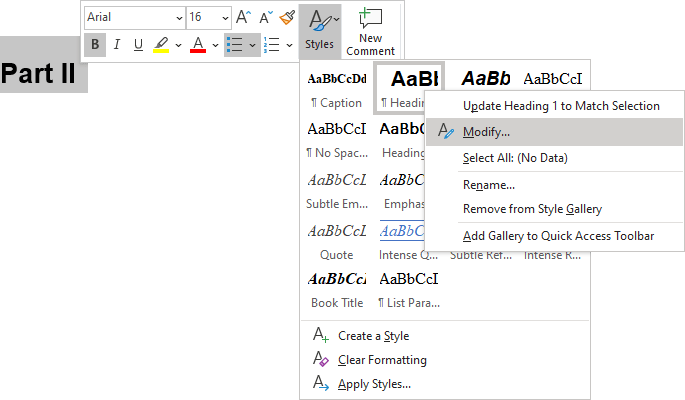
- Right-click on the text with the needed style (for example, Heading 1) or some text you want to apply this style, then click the Styles list in the Mini Toolbar.
In the Style gallery, right-click on the style and choose Modify... in the popup menu:
2. In the Modify Style dialog box, click the Format button and then choose Numbering...:

3. In the Numbering and Bullets dialog box, choose the numbering format you prefer, or click the Define New Number Format... button to create a custom numbering:

In the Define New Number Format dialog box:

- The Number style list specifies the numbering style: Arabic numerals; uppercase and lowercase Roman numerals; uppercase and lowercase alphabet letters; word series (1st, One, and First), etc. See examples in the Customizing numbered lists tip.
- The Font... button opens the standard Font dialog box that allows selecting the specific font or font attributes (such as bold, italic, and underline) and the point size for the numbers.
- The Number format field offers to type the characters you want to come before each number (if needed). For this example, the word Part:

- In the Alignment list, choose the distance from the left, centered, or right margin that Word places the number.
For example:

Add multilevel numbering to the heading style
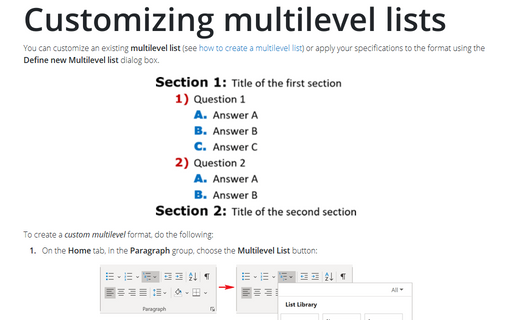
To create a multilevel list for headings, do the following:
1. On the Home tab, in the Paragraph group, click the Multilevel List button:

2. Do one of the following:
- To create a pre-defined multilevel list for headings, click the arrow next to the Multilevel List button and choose any of the pre-defined styles for headings:

- To create a custom multilevel list for headings, click the arrow next to the Multilevel List button and choose Define New Multilevel List...:

In the Define new Multilevel list dialog box, click the More>> button in the lower-left corner:

Word displays an extra panel at the right of the dialog box, so you see the full dialog box:

To link this numbered list level to a particular style, select the style in the Link level to style drop-down list:

Make other changes for the custom list levels (see how to customize multilevel lists for more details).
For example:

After applying the heading styles:
- The Styles Gallery will look like this:

- You can see the numbered list for headings:

Note: To modify the numbering or numbering format, you need to modify this custom multilevel list (see how to customize the multilevel list), not the numbering in the heading style (like described in the Add numbering to the heading style).
