Customizing numbered lists
I. To create a custom numbering format, do the following:
1. On the Home tab, in the Paragraph group, choose the Numbering button:

2. In the Numbering list, click Define New Number Format... item to display the Define New Number Format dialog box:

3. In the Define New Number Format dialog box:
- Number style - Specifies the numbering style that you want. Choices include Arabic numerals, uppercase and lowercase Roman numerals, uppercase and lowercase alphabet letters, and word series (1st, One, and First). You can also choose no numbers at all, killing the sequential numbering.
- Font... - Specifies the special font or font attributes (such as bold, italic, and underline) and the point size for the numbers. A standard Font dialog box appears when this button is chosen.
- Number format - Types the characters, if any that you want to come before each number. If you
want each number enclosed in parentheses, for example, type an opening parenthesis before the number
in this box.
Do not type over this number in this box! If you do so, even replacing it with another number, you will break the automatic numbering; each number in the list will be the same. - Alignment - Sets the distance from the left, centered or right margin that Word places the number.
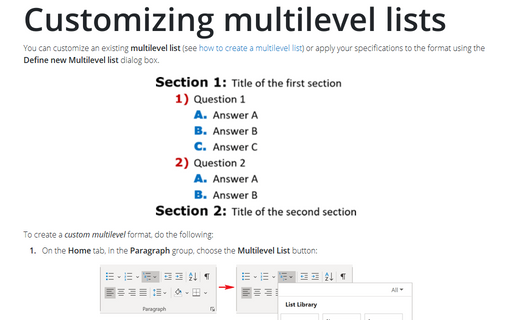
II. To create a custom multilevel list format, following:
On the Home tab, in the Paragraph group, choose the Multilevel List button and click Define New Multilevel List... item to display the Define new Multilevel List dialog box:

If the button in the lower-left corner is the More >> button, click it. Word displays an extra panel at the right of the dialog box, so you see the full dialog box, as shown here. Word also changes the More >> button to a << Less button that you can click to hide the extra section of the dialog box again.
- In the Click Level To Modify, select the list level you want to change. Word selects the first level, 1, when you open the Define New Multilevel List dialog box.
- If you need to link this numbered list level to a particular style, select the style in the Link Level To Style drop-down list.
- Use the controls in the Number Format area to specify the number format.
- In the Number Style For This Level drop-down list, select the number format you want
to use. For example:
- "1, 2, 3,"
- "i, ii, iii,"
- "A, B, C."
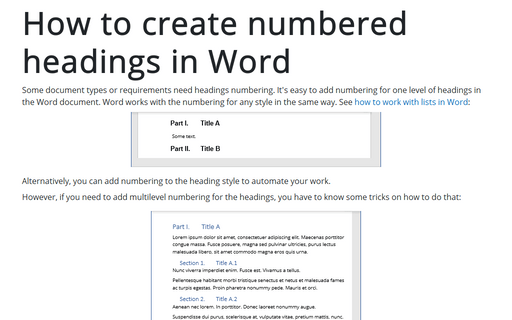
- To include the number from the previous level (or a higher level), choose the level from the Include Level Number From drop-down list. (This drop-down list is unavailable for the first level because there's no level above it.) For example: if Level 1 uses "1, 2, 3" numbering and Level 2 uses "a, b, c" numbering, applying Level 1 in the Include Level Number From drop-down list to Level 2 changes the Level 2 numbering to 1a, 1b, and so on.
- Word displays the number formatting you've chosen in the Enter Formatting For Number text box. Type any changes for the text of the format into this text box. For example, you might edit the "A)" format to "Section A)" so that each instance of the number included the word "Section."
- To specify font formatting, click the Font button. Word displays the Font dialog box. Choose the font, font style, size, and any extras (such as color or effects), and then click the OK button.
- To customize the numbering, use the Start At spinner to change the starting number. If you want to restart numbering after a certain level, select the Restart List After check box and choose that level in the drop-down list. (The Restart List After controls aren't available for the first level in the list, because there's no higher level.)
- Select the Legal Style Numbering check box if you want to use legal-style numbering: changing any roman numeral to an Arabic numeral. For example, 1.1.1 instead of I.1.1.
- In the Number Style For This Level drop-down list, select the number format you want
to use. For example:
- Use the controls in the Position box to customize where the number appears.
- In the Number Alignment drop-down list, choose Left, Centered, or Right.
- In the Aligned At text box, choose the position at which to align the number.
- In the Text Indent At text box, set the indent position for the text.
- In the Follow Number With drop-down list, select the character to include after the number: a tab, a space, or nothing. If you choose a tab, you can select the Add Tab Stop At check box and set the distance at which to place a tab stop.
Note: more details are available in the Numbered lists section in the Work with bulleted, numbered and multi-level lists lesson of the Create basic documents free course.
See also this tip in French: Comment personnaliser une liste numérotée.


