How to work with images in a Word document
Insert an image
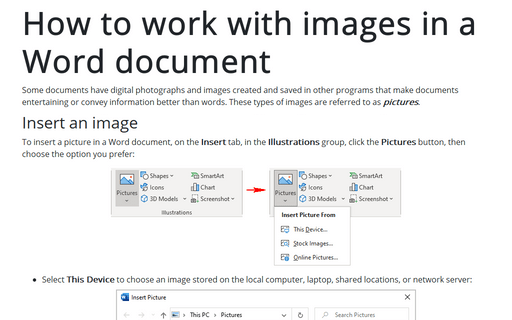
To insert a picture in a Word document, on the Insert tab, in the Illustrations group, click the Pictures button, then choose the option you prefer:

- Select This Device to choose an image stored on the local computer, laptop, shared locations, or network server:

Select an image in the Insert Picture dialog box and click the Insert button.
- Select Stock Images to choose Stock Images, Icons, Cutout People, Stickers, and Illustrations from the stock image library:

Select one or several objects (see the number near the Insert label) and click the Insert button.
- Select Online Pictures to find and insert images from Bing, Microsoft's search engine, or OneDrive:

Select one or a few objects (see the number near the Insert label) and click the Insert button.
Note: Another option is to insert the image as a linked object that creates a link between the document and the external image but does not embed the image in the Word document. Using linked objects can help minimize the file size of the final document while preserving images, photographs, and other objects that can take up storage space. However, if image files are not available when you open a Word document, the images are not displayed. This option is not recommended to create documents distributed to other users, as they may not access the images.
When you click on a picture, Word shows the Picture Format tab:

Using features from that tab, you can:
- Adjust picture characteristics:
- Remove the background by designating either the areas you want to keep or those you want to remove
- Sharpen, soften, and adjust the brightness of images for better printing or on-screen presentation
- Apply different color masks to achieve antiquing, sepia tone, grayscale, and a variety of other color effects
- Choose one of 23 special effects, such as pencil sketch, blurring, charcoal sketch, paint strokes, and others
- Apply effects such as shadows, reflections, and borders; or apply combinations of these effects
- Choose a picture transparency
- Compress the pictures in the document
- Format picture by using predefined picture styles or choosing some of the proposed features such as shape and orientation, borders, and other effects
- Arrange the picture to specify its relationship to the page and other elements on the page
- Crop the parts of the picture or crop the picture to a shape
- Resize, scale, and rotate the picture by using its sizing handles or appropriate fields in the Layout dialog box (see below)
- Position the object in any of several predefined locations on the page
- Specify how other text should wrap around the object.
Resize an image
To resize a picture, select it and do one of the following:
- On the Picture Format tab, in the Size group, change the Height and Width for the picture in the appropriate fields:

- Click and drag the side sizing handles to stretch it horizontally or vertically:

Scale an image
To scale a picture, select it and do one of the following:
- On the Picture Format tab, in the Size group, click the dialog box launcher:

- Click and drag one of the corner sizing handles to maintain the image's current shape. The image will change size while keeping the same proportions:

- Open the Layout dialog box by one of the methods:
- On the Picture Format tab, in the Size group, click the dialog box launcher.
- Right-click the selected picture and choose Size and Position... in the popup menu:

In the Layout dialog box, on the Size tab, in the Scale section:

- Rescale the picture by changing the height and width percentages.
- Select the Lock aspect ratio check box (selected by default) to scale the picture by height and width using the same percentage.
Deselect the Lock aspect ratio check box to scale height and width separately.
- Select the Relative to original picture size check box (selected by default) to scale the picture height and width as percentages of the original size.
Note: See the picture's original size in the Original size section.
Rotate an image
To rotate a picture, do one of the following:
- Click and drag the rotation handle at the top of the border:

- Open the Layout dialog box by one of the methods:
- On the Picture Format tab, in the Size group, click the dialog box launcher.
- Right-click the selected picture and choose Size and Position... in the popup menu.
In the Layout dialog box, on the Size tab, select or type a rotation in the Rotation field.
Hide and display images on the page
The picture can be hidden using the Selection pane (see how to open it). For example, Picture 6:

To hide the picture, click the Showing icon ![]() to the right of the object name. After clicking that icon, it will change to a simple icon indicating that the object is Hidden
to the right of the object name. After clicking that icon, it will change to a simple icon indicating that the object is Hidden ![]() from view. To show the object once again, click the Hidden icon
from view. To show the object once again, click the Hidden icon ![]() , and it will reappear.
, and it will reappear.
Note: You can hide all images in the document by changing global Word options:

See Hiding pictures for more details.
Copy the formatting
To copy the formatting of one picture to another picture, do the following:
1. Select the formatted picture, which formatting you need to copy.
2. On the Home tab, in the Clipboard group, click the Format Painter button:

3. Click another picture to apply the color adjustments, color corrections, or picture style from the first picture.
Add an Alternative text for images
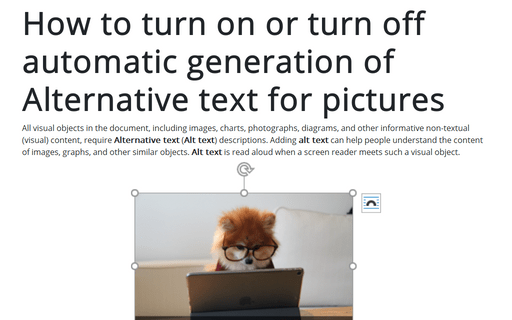
The Alternative text (Alt text) for pictures is a common requirement. By default, Word generates Alt text for all inserted pictures (see how to turn off that feature).
Alt text is:
- Read aloud when a screen reader will encounter such an image.
- Shown if there are some problems with displaying an image.
You can see the generated Alt text at the bottom of the object immediately after inserting it in a document:
 or
or

To change or add Alt text to a picture, do the following:
1. Select the picture.
2. Open the Alt text pane by doing one of the following:
- On the Picture Format tab, in the Accessibility group, click the Alt Text button:

- Right-click and choose Edit Alt Text... in the popup menu:

- On the Review tab, in the Accessibility group, click the Check Accessibility button, then choose Alt Text:

3. On the Alt Text pane:

- Modify or enter an Alt text you need.
Alt text should briefly describe the purpose or content of the image, photo, icon, table, or equation. It is recommended to use no more than 15 words.
- Select the Mark as decorative check box if the picture is purely decorative and does not provide helpful information for the document content.
Note: If the option for automatic generation of Alt text for pictures is turned on (see how to turn on and turn off that feature), after modifying a generated Alt text, you can regenerate it by clicking the Generate a description for me:

See also how to create picture captions.


