Formatting table cells in PowerPoint
PowerPoint
365
A convenient way to display data is to present it in a tabular form - in the form of a grid of rows and columns. You can create or insert different types of tables into your PowerPoint slides. You can also apply different formatting to the entire table or a selected area, such as a cell, multiple cells, rows, or columns.
Along with resizing cells, you can change the look of cell contents:
Align text in a table cell
To align the text in one or more cells, select them, then do one of the following:
- On the Table Layout tab, in the Alignment group:

- Choose one of the three horizontal alignments:
 - Align Left (Ctrl+L),
 - Center (Ctrl+E),
 - Align Right (Ctrl+R),
- Choose one of the three vertical alignments:
 - Align Top,
 - Center Vertically,
 - Align Bottom.
- Choose one of the three horizontal alignments:
- Right-click on the selection, then choose Format Shape... in the popup menu:
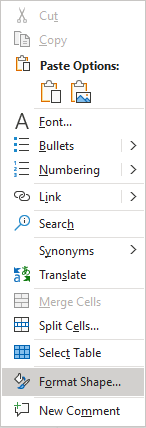
On the Format Shape pane, on the Text Options tab, in the Textbox group, from the Vertical alignment dropdown list, choose the option you need:

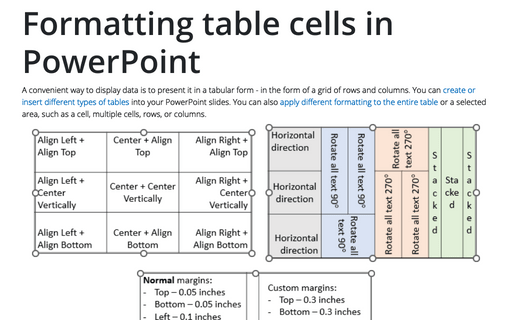
For example:

Modify text Direction
To change the text direction, select a cell or several cells, then do one of the following:
- On the Table Layout tab, in the Alignment group, click the Text Direction dropdown list, and choose one of the following options:
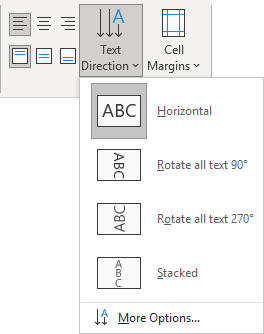
- Horizontal,
- Rotate all text 90o,
- Rotate all text 270o,
- Stacked,
- Click More Options... to open the Format Shape pane (see below).
- Right-click the selection, then choose Format Shape... in the popup menu. On the Format Shape pane, on the Text Options tab, in the Textbox group, from the Text direction dropdown list, choose the option you need:

For example:

Change the cell margins
To change the cell spacing, select a cell or several cells, then do one of the following:
- On the Table Layout tab, in the Alignment group, click the Cell Margins dropdown list, and choose one of the following options:
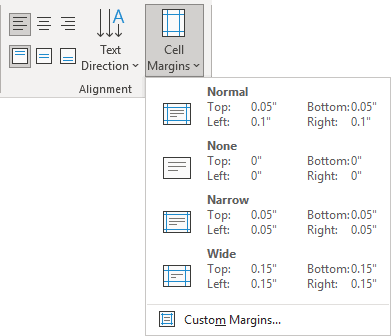
- Normal,
- None,
- Narrow,
- Wide,
- Click Custom Margins...
In the Cell Text Layout dialog box, in the Internal margin section, type or select values you prefer:

- Right-click on the selection, then choose Format Shape... in the popup menu. On the Format Shape pane, on the Text Options tab, in the Textbox group, type or select the appropriate values in the Left margin, Right margin, Top margin, and Bottom margin fields:

For example:

