WordArt

Apply a WordArt effect
To apply a WordArt effect to existing text, do the following:
1. Select the text that you want to modify.
2. On the Shape Format tab (or SmartArt Format tab, Chart Format tab), in the WordArt Styles group, click the More button to display the WordArt Styles gallery:

3. In the gallery, select the WordArt effect that you want to apply to the selection:

PowerPoint formats the selection. For example:

Create a WordArt object
Instead of applying WordArt effects to pre-typed or inserted text, you can create a separate WordArt object. A SmartArt object is a regular text box that contains only the WordArt-formatted text.
To create a WordArt text object, do the following:
1. On the Insert tab, in the Text group, click the WordArt button:
 or
or

2. From the WordArt gallery, select the WordArt style that you prefer:

PowerPoint inserts a new text box with the WordArt placeholder text Your text here in the middle of the slide. For example:
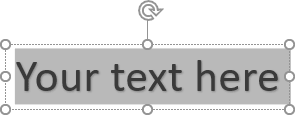
3. Replace the placeholder text with your own.
Modify WordArt formatting
The WordArt text can be formatted as a regular text using the normal text-formatting controls such as Font, Font Size, Bold, Italic, etc. (see font formatting):

Additionally, the WordArt utility offers many different formatting and effects you can use. To modify WordArt formatting, select a text you want to modify, then do one of the following:
To change a predefined WordArt style
On the Shape Format tab (or SmartArt Format tab, Chart Format tab), in the WordArt Styles group, from the WordArt Styles gallery, select one of the predefined styles.
To customize the WordArt text fill
To customize the text fill using the Format *** pane, such as the Format Shape pane, Format Chart Area pane, Format Chart Title pane, etc., see text fill formatting.
To customize the text fill, on the Shape Format tab (or SmartArt Format tab, Table Design tab, Chart Format tab), in the WordArt Styles group, click the Text Fill dropdown list, then do any of the following:

- In the Theme Colors palette, select one of the six shades of each of the 10 theme colors. Colors in this palette depend on the used Theme.
- In the Standard Colors palette, select one of the 10 standard colors available in all Microsoft documents, regardless of the theme. The colors in this palette are the same on all computers.
- Click No Fill to clear the text fill formatting.
- Click More Fill Colors... to use non-theme colors (see how to apply a solid color for more details).
- Use Eyedropper to choose the color from any other object on the slide. To do so, follow the next steps:
1. Click the Eyedropper. The cursor changes to the shape of an eyedropper.
2. Click any element on the slide to select that color:

- Click Picture... to insert a picture as a texture for the selected text:

- From the Gradient list, select the gradient schema you prefer:

For example:

Or select More Gradients... to customize your schema. See more about how to work with gradients.
- From the Texture list, choose any of the 24 predefined textures:

For example:

See more about how to use a texture fill.
To customize the text outline
To customize the text outline using the Format *** pane, such as the Format Shape pane, Format Chart Area pane, Format Chart Title pane, etc., see text outline formatting.
To customize the text outline, on the Shape Format tab (or SmartArt Format tab, Table Design tab, Chart Format tab), in the WordArt Styles group, click the Text Outline dropdown list, then do any of the following:

- Select a different color from the Theme Colors or Standard Colors palette in the same way as for the text filling.
- Click No Outline to hide the outline.
- Click More Outline Colors... to use non-theme colors (see how to apply a solid color for more details).
- Click Eyedropper to choose the color from any other object on the slide in the same way as for the text filling.
- From the Weight list, select the line weight you prefer:
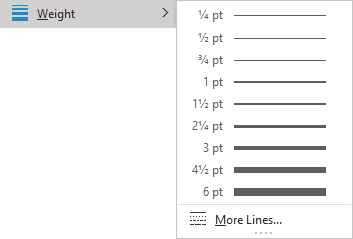
Or select More Lines... to open the Shape Format pane with more options for outline width, compound type, etc. See text outline formatting for more details.
- Form the Dashes list, select the dash type you prefer:
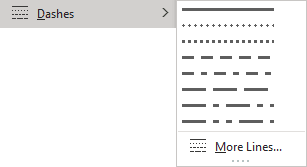
Or select More Lines... to open the Shape Format pane with more options. See text outline formatting for more details.
For example:

See also Text effects.
