Save workbooks in PDF format
The PDF version of the Excel workbook or worksheet can be viewed and printed by those who do not have Excel.
Excel offers at least three ways to save a workbook in PDF format. Choose the one you prefer:
A. Save the workbook as a PDF file using the Save As pane:
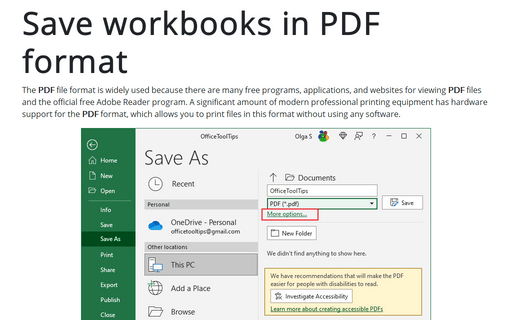
On the File tab, click Save As (or Save a Copy, if you opened a document from any non-local storage), then from the File type dropdown list, select PDF:

If needed, click the More options... link to open the Save As dialog box with additional options that control the PDF output details (see below):

Note: Read more about the Accessibility Checker.
B. Save the workbook as a PDF file using the Save As dialog box
On the File tab, click Save As, then click Browse to open the Save As dialog box.
In the Save As dialog box:
- From the Save as type list, select PDF:

- If you want to create a PDF file that has a smaller file size (but lower quality), click Minimum size (publishing online)
- To modify any of the default settings, click the Options... button to open the Options dialog box:

In the Options dialog box:
- In the Page range section, specify the pages to include in the PDF file
- In the Publish what section, specify sheets, selected items, or print areas
- In the Include non-printing information section, enable or disable non-printing elements such as file properties
- Select compliance
- If you do not want to automatically open the new PDF file in your default PDF viewer, clear the Open file after publishing checkbox:

C. Export the workbook to a PDF file
On the File tab, click Export, then click the Create a PDF/XPS button:

In the Publish as PDF or XPS dialog box, specify a filename and location and set some other options (see above, the same as in the Save As dialog box):

Note: XPS is another "electronic paper" format developed by Microsoft as an alternative to PDF. However, there is currently little third-party support for the XPS format.


