Check data entry for invalid entries
To make Excel check data entry for invalid entries, follow these steps:
1. Select the cell or range you want Excel to check.
2. On the Data tab, in the Data Tools group, click Data Validation:
 or
or

3. In the Data Validation dialog box:
3.1. On the Settings tab, specify the validation criteria to use:

Select the appropriate type in the Allow drop-down list, and then set parameters accordingly:
- Any Value accepts any input (Excel's default setting for cells). This setting effectively turns off validation, so you usually select it only when you need to remove validation from a cell or range. But you can also use this setting to display an informational message for a cell or range. Enter the title and message on the Input Message tab, as discussed in step 3.2.
- Whole Number lets you specify a comparison operator and appropriate values. The user must not enter a decimal point.

The validation criteria use these self-explanatory comparison operators: Between, Not Between, Equal To, Not Equal To, Greater Than, Less Than, Greater Than or Equal To, and Less Than or Equal To.
- Decimal lets you specify a comparison operator and appropriate values. The user must include a decimal point and at least one decimal place (even if it's .0).
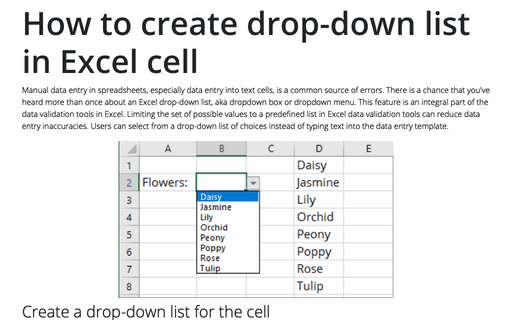
- List lets you specify a list of valid entries for the cell. You can type in entries in the Source text box, separating them with commas, but the best form of the source is a range on a worksheet in the workbook. If you hide the worksheet, the users won't trip over it. Usually, you'll want to select the In-Cell Dropdown option to produce a drop-down list in the cell. Otherwise, users have to know the entries (or enter them from the help message):

See more about creating a dropdown list in a cell:

- Date lets you specify a valid date range from the Data drop-down list choices.
For example, you can specify that the entered data must be greater than January 1, 2020:

- Time lets you specify a valid time range from the Data drop-down list choices.
For example, you can specify that the entered data must be between 7 AM to 8 PM:

- Text Length lets you specify a valid length using the Data drop-down list.
For example, you can specify that the length of the entered data should be Equal To 1 (a single character).
- Custom lets you specify a formula that returns a logical TRUE or a logical FALSE value.
The general checkboxes:
- Ignore Blank (selected by default): If selected, blank entries are allowed.
- Apply these changes to all other cells with the same setting (not selected by default): If selected, the changes apply to all other cells that contain the original data validation criteria.
For example, if you need to change the Data Validation rule, you can open the Data Validation dialog box for just one cell and check the Apply these changes to all other cells with the same setting checkbox to see all the cells with the same rule. Make changes to the rule and apply it to all cells with the same original rule:

See more about how to check the existing data using the Data Validation feature.
3.2. On the Input Message tab, choose whether to have Excel display an input message when the cell is selected. If you leave the Show input message when cell is selected checkbox selected (as it is by default), enter the title and input message in the text boxes:

When a user selects a restricted cell, Excel displays the information message (unless you choose not to display one), E.g.:

3.3. On the Error Alert tab, choose whether to have Excel display an error alert after the user enters invalid data in the cell. If you leave the Show error alert after invalid data is entered checkbox selected (as it is by default), choose the style (Stop, Warning, or Information) in the Style drop-down list, and enter the title and error message in the text boxes.

- Stop alerts prevent the user from continuing until they enter a valid value for the cell:

- Warning alerts and Information alerts display the message but allow the user to continue after entering an invalid value in the cell:


4. Click the OK button to close the Data Validation dialog box and apply the validation to the cell or range.
See also this tip in French: Comment vérifier l'entrée de données pour les valeurs non valides.

