How to protect spreadsheets
On the Review tab, in the Changes group, choose which part of your Excel document you want to protect: a particular spreadsheet or the workbook. You can also choose to protect and share your workbook.

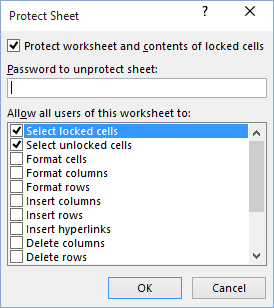
1. If you choose Protect Sheet, you'll see the dialog box:

Here you can enter a password to unprotect the sheet, and then choose from the long list provided which actions you're willing to allow users of the spreadsheet to perform. For more details see Protecting spreadsheet elements.
2. With Protect Workbook you can protect elements of each spreadsheet, you can protect structure of the sheets in the workbook, prohibiting renaming, moving and other operations.

For more details see Protecting workbook elements.
3. With Protect and Share Workbook, Share Workbook and Track Changes you can easily work together on workbooks and monitor who, when and what changes made. E.g., track project status and tasks.
For more details see Share workbook and track changes.
4. Allow Users to Edit Ranges offers the ability to assign user-level permissions to different areas on a protected spreadsheet. You can specify which users can edit a particular range while the spreadsheet is protected. As an option, you can require a password to make changes.
For more details see Allow specific users to edit ranges in a protected spreadsheet.
See also this tip in French: Comment protéger les feuilles de calcul.

