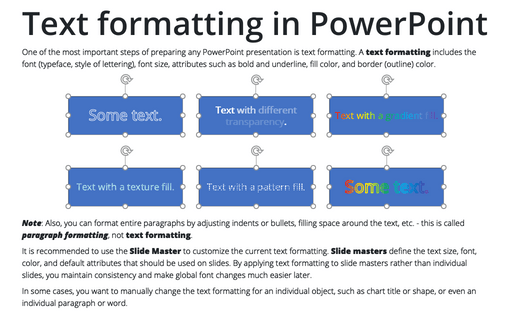
Text formatting in PowerPoint
Note: Also, you can format entire paragraphs by adjusting indents or bullets, filling space around the text, etc. - this is called paragraph formatting, not text formatting.
It is recommended to use the Slide Master to customize the current text formatting. Slide masters define the text size, font, color, and default attributes that should be used on slides. By applying text formatting to slide masters rather than individual slides, you maintain consistency and make global font changes much easier later.
In some cases, you want to manually change the text formatting for an individual object, such as chart title or shape, or even an individual paragraph or word.
Font formatting
You can format the text by using all the usual text-formatting methods:
- On the Home tab, in the Font group:

- In the Font dialog box:

Note: To open the Font dialog box, on the Home tab, in the Font group, click the dialog box launcher, or click Ctrl+T. See also shortcut keys for working with fonts.
Modify a text formatting
In addition to the normal text-formatting controls, PowerPoint offers many different formatting and effects for the text you can use.
To modify text formatting using the ribbon, see how to modify WordArt formatting.
To modify a text formatting using the Format *** pane, such as the Format Shape pane, the Format Chart Area pane, or the Format Chart Title pane, select the object or several objects, then do one of the following:
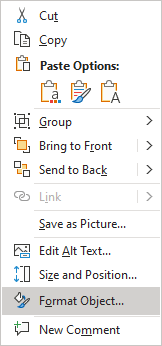
- Right-click the selection, then choose Format Shape..., Format Picture..., even Format Chart Area..., Format Data Series..., etc. in the popup menu:
- On the Home tab, in the Drawing group, click the dialog box launcher:

Text fill formatting
On the Format *** pane, such as the Format Shape pane, Format Chart Area pane, Format Chart Title pane, on the Text Options tab, in the Text Fill & Outline group, in the Text Fill section:
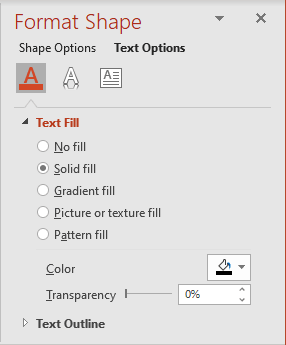
- Select No Fill to clear the text fill formatting.
This option is useful if you prefer to create hidden text or transparent text with outline formatting only (see about outline formatting below):

- Select the Solid fill option to choose the Color and its Transparency.
- Click the Color button to choose the color you prefer to fill the selected text.
- Move the Transparency slider to adjust the color transparency, or set a specific transparency percentage:

Note: By default, fill colors are opaque (other background formatting does not show through). A transparency setting of 100% makes the fill color invisible, while the default value for an opaque color is 0%.
- Select the Gradient fill option to create a gradient filling for the selected text:

- The Picture or texture fill allows using one of the following:

- Insert a picture from any graphic file from different sources by clicking the Insert... button.
- Insert any graphic object such as a picture, SmartArt, chart, diagram, etc., from the Clipboard.
- Choose any of the predefined textures from the Texture dropdown list:

You can select from various textures, including fabric, marble, granite, wood grain, and Formica-like textures in various colors. See how to use a texture fill.
- Select the Pattern fill option to apply one of 48 simple patterns with different Background and Foreground colors:

Text Outline formats
On the Format *** (such as Format Shape, Format Picture, Format Chart Area, Format Data Series, etc.) pane, on the Text Options tab, in the Text Fill & Outline group, in the Text Outline section, choose the one you need:
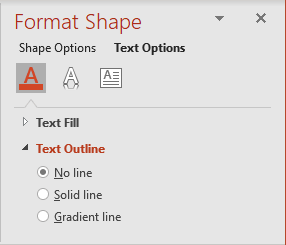
- The No line option hides a text outline.
- The Solid line option allows choosing:

- The Color and its Transparency - see more about how to apply a solid color.
- The Width of a text outline allows specifying the thickness of the line in points.
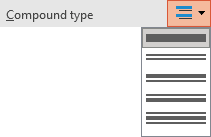
- The Compound type list contains a predefined set of parallel lines that comprise the overall line and their relative thicknesses:
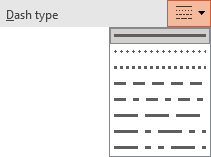
- The Dash type list contains the predefined styles of a line (solid, dashed, dotted, etc.):
- The Cap type list allows to choose one of the styles for the ends of the line (applicable to lines only):

- The Join type list allows to choose the style for the corners:

For example:

- Select the Gradient line option to create a gradient outline for a text. For example:

See also text effects in PowerPoint.
Clear formatting
To remove the text formatting and any effect (except Transform), select the text, then on the Home tab, in the Font group, click the Clear All Formatting button:

