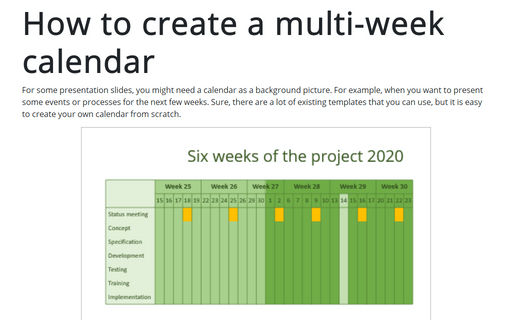
How to create a multi-week calendar

To create a calendar for several weeks, do the following:
1. Choose the period that you want to show on the calendar.
For example, it will be the period from the 15th of June 2020 to the 24th of July 2020. It consists of 6 weeks, from the 25th week of the year to the 30th week.
2. Create a table of 7 columns (one column for tasks names + 6 for each week) and 9 rows (two for the title rows + 7 for tasks), and do one of the following:
- On the slide, click the Insert Table icon:

In the Insert Table dialog box, enter or select the appropriate number of columns and rows for the table:

- On the Insert tab, in the Table group, click on the Table dropdown list and select as many columns and rows as you need, but not more than 8 rows and 10 columns:

Click on the table and then add one more row by clicking on the Insert Below (or Insert Above) button, on the Table Layout tab, in the Rows & Columns group:

Any of both ways create the table:

3. Insert the weeks in the first row and tasks in the first column (starting from the third row):

4. To show every day in the week, you need to split columns (except the first one) to the appropriate amount of the working days:
4.1. Select cells from the column you want to split:

4.2. Right-click on the selection and choose Split Cells... in the popup menu:

4.3. In the Split Cells dialog box, enter or select the new number of columns (in this case, the number of working days in the week):

4.4. Do the same for other weeks. In this example, weeks 26, 28, and 29 were split into the 5 columns, weeks 27 and 30 – into the 4 columns (because of holidays).
4.5. Enter the day numbers in the second row:

5. Change the size of the table or any row or column:
5.1. To change the size of the table, just click anywhere on the table and drug and drop on the resizing points:

It changes the size of the table and resizes all columns or/and rows. They will be changes proportionally:
5.2. To make the size of rows or columns equal, do the following:
a. Select which columns or rows you want to change (select the appropriate column or row, or several columns or rows):

b. On the Table Layout tab, in the Cell Size group, change the Height or Width of the selected rows or columns or just click Distribute Rows or Distribute Columns:

It changes sizes just for selected rows or columns:

6. Change the text in the second row:
The days from the second row should be very small to be displayed in one line. It is because of the cell's margins. To change the margins of the cells, do the following:
6.1. Select cells for which you will change margins:

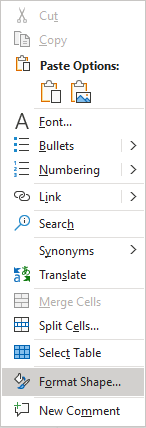
6.2. Right-click on the selection and choose Format Shape... in the popup menu:
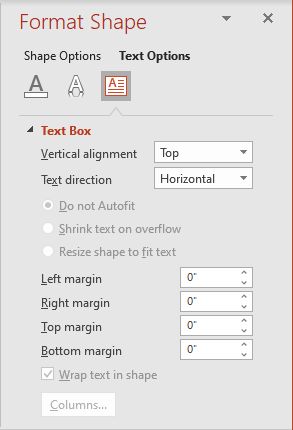
6.3. On the Format Shape pane, on the Text Options tab, in the Textbox group, in the Text Box section, change margins (for example, to 0):
7. Change the design as you prefer:
7.1. To change the design of some cell or several cells:
7.1.1. Right-click on the cell you want to change and select the Format Shape... in the popup menu.
7.1.2. On the Format Shape pane, on the Shape Options tab, in the Fill & Line group, in the Fill section, choose the color you prefer:
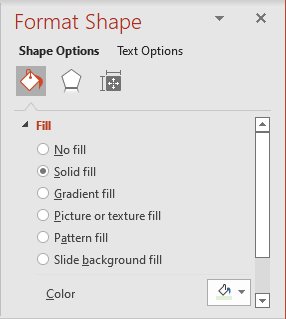
You can choose Gradient fill or even Picture to insert in the cell like a background picture.
7.2. To change the design of the table:
Click anywhere on the table, and then on the Table Design tab, choose the appropriate design in the Table Styles group:

- by choosing any predefined designs,
- by creating your own design, using different options proposed in the Shading, Borders, and Effects dropdown lists.
Note: If you would like to change the table border color, see How to change color for the table borders in PowerPoint.
See also this tip in French: Comment créer un calendrier de plusieurs semaines.
