Add 3D look to graphic objects
Bevel (3-D format)
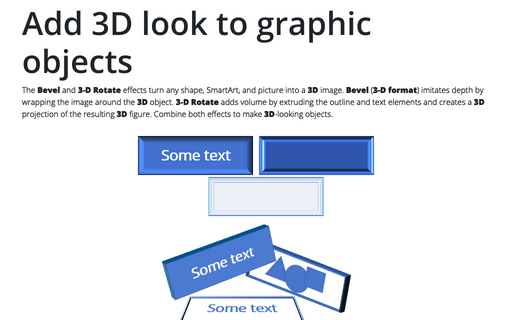
A Bevel is the slope, curvature, or rounding of the edges of an object to make it appear raised, sunken, or textured. A bevel is a 3-D format effect applied to flat shapes and other objects to give them a thick, three-dimensional look. This effect can be combined with a real 3-D Rotation effect.
Apply the bevel effect using the ribbon tabs
1. Select the Bevel variation from the Bevel list:
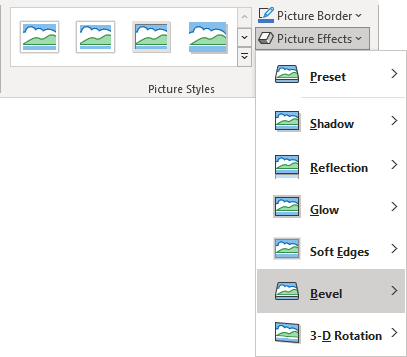
- On the Picture Format tab, in the Picture Styles group, click the Picture Effects dropdown list, then select the Bevel list:
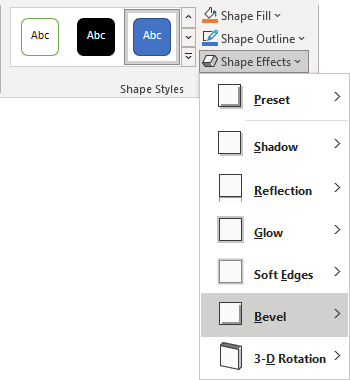
- On the Shape Format tab (or SmartArt Format tab, Chart Format tab), in the Shape Styles group, click the Shape Effects dropdown list, then select the Bevel list:
- On the Table Format tab, in the Table Styles group, click the Effects dropdown list, then select the Cell Bevel list:
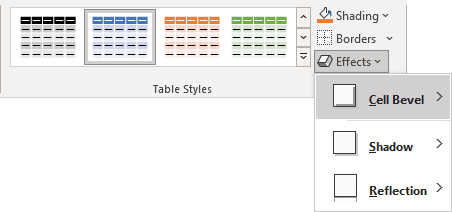
2. In the Bevel or Cell Bevel list:
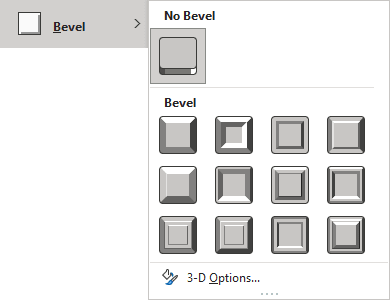
- To remove the bevel effect, choose No Bevel.
- From the Bevel area, select a preset you prefer for the Top bevel.
- Click the 3-D Options... to open the Format pane to specify more options for the 3-D format effect.
Apply the bevel effect using the Format pane
On the Format pane (such as Format Shape, Format Picture, Format Chart Area, Format Data Series, etc.), in the Effects group, in the 3-D Format section:
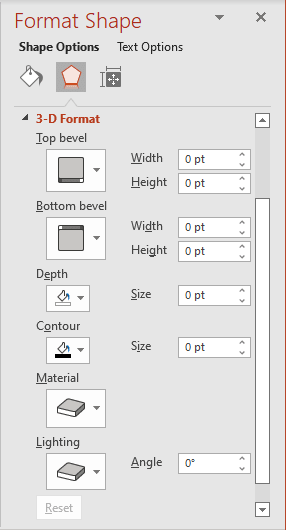
- For the Top bevel:
- Choose one of the predefined effects from the Top bevel list. They are the same as the Bevel dropdown list in the ribbon tab.
- Set or choose the value for the Width and Height of the Top bevel (in points):
- Width specifies how far the effect expends into the object,
- Height specifies how dramatic the effect is vertical.
Note: You may not notice the difference in bevel Height until a 3D rotation is applied to the object. The Width setting is immediately visible to all objects.
- For the Bottom bevel:
- From the Bottom bevel list, choose one of the predefined effects. The Bottom bevel setting has no visible effect unless you apply a 3-D Rotation to the object.
- Set or choose the value for the Width and Height of the Bottom bevel (in points).
- The Depth option allows specifying the Color and Size of the object's sides. However, the sides are not visible unless the object is three-dimensionally rotated. See more about how to apply a solid color.
- The Contour option allows specifying the Color and Size of outlines or borders that mark the edges of the 3-D effect. See more about how to apply a solid color.
- The Material option determines how shiny the surface looks and how bright its color is on the front side compared to the other sides. The Material list contains the predefined Standard, Special Effect, and Translucent surfaces, such as Matte, Plastic, and Metal, that the object should simulate:

- The Lighting option allows choosing one of the predefined types of lighting from the Neutral, Warm, Cool, or Special areas, such as Balance, Soft, and Bright Room. To adjust the direction from which light hits an object, choose or type the appropriate value in the Angle field:
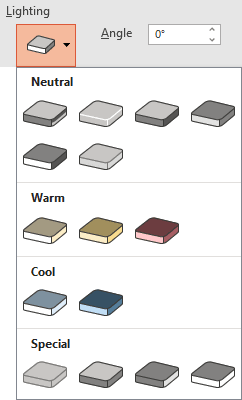
For example:

To clear all customization made in the 3-D Format section, click the Reset button.
3-D Rotation
The 3-D Rotate effect makes a 2D (two-dimensional) object appear 3D (three-dimensional) by applying perspective to it. The 3-D Rotation effect uses angle measurements for three dimensions: X, Y, and Z:
- X rotation: left-to-right or right-to-left (side to side) rotation
- Y rotation: rotation from top to bottom and vice versa
- Z rotation: rotation around the center point
X and Y rotation changes the object's shape on the slide to simulate perspective. Z rotation simply rotates the object as if you were using the rotation handle ![]() .
.
Combining 3-D Rotation with 3-D Format effects is recommended to create more interesting and impressive effects, such as adding "sides" to a flat object and coloring those sides in a certain way.
Apply the 3-D Rotation effect using the ribbon tabs
1. Do one of the following:
- On the Picture Format tab, in the Picture Styles group, click the Picture Effects dropdown list, then select the 3-D Rotation list:
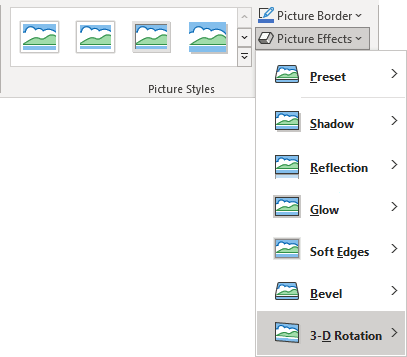
- On the Shape Format tab (or SmartArt Format tab, Chart Format tab), in the Shape Styles group, click the Shape Effects dropdown list, then select the 3-D Rotation list:

Note: There is no 3-D rotation effect for tables in PowerPoint.
2. In the 3-D Rotation list:
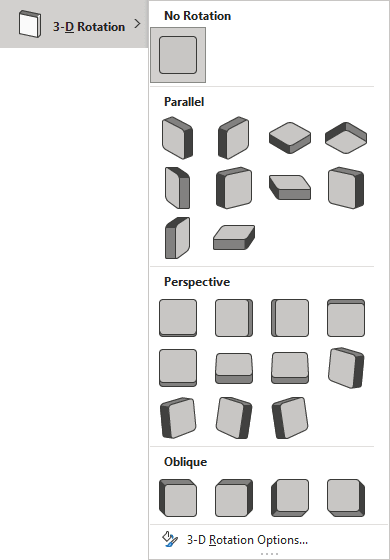
- To remove the rotation effect, choose No Rotation.
- Select the preset from the Parallel, Perspective, or Oblique area.
- Click the 3-D Rotation Options... to open the Format pane to specify more options for the 3-D rotation effect.
Note: If you have not yet added depth to the shape using the 3-D Format settings, you won't see any effect from the Oblique presets because the shape doesn't have "sides" yet.
Apply the 3-D Rotation effect using the Format pane
On the Format pane (such as Format Shape, Format Picture, Format Chart Area, Format Data Series, etc.), in the Effects group, in the 3-D Rotation section:
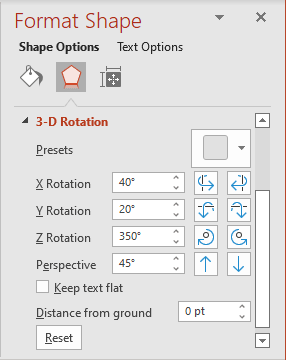
- Choose one of the predefined rotation effects in the Presets list. They are the same as the 3-D Rotation dropdown list on the ribbon tab.
- To customize each rotation factor separately, choose or type the angle for X Rotation, Y Rotation, Z Rotation, and Perspective.
Notes:
- You can use the appropriate buttons next to the angle field to increase and decrease the angle settings.
- To change the Perspective option, select any Preset in the Perspective area to unhide that option.
For example:

Other options:
- The Keep text flat option prevents any text in shape from rotation on the X- or Y- axis:

- The Distance from ground option adds space between the object and the background:

To clear all customization made in the 3-D Rotation section, click the Reset button.
Presets
Presets are pre-configured 3D effect combinations with other effects that are frequently used in Microsoft Office. They include combinations of gradient fills and edge formatting (such as bevels) that give an object some depth.
The Presets for:
- Shapes are available on the Shape Format tab (SmartArt Format tab, Chart Format tab), in the Shape Styles group, in the Shape Effects list:

- Pictures are available on the Picture Format tab, in the Picture Styles group, in the Picture Effects list:

- Tables are not available. There are no Presets for tables. See more about tables in PowerPoint.
