How to redirect replies
For example, if the author sends a certain proposal to the members of a certain working group, all changes, suggestions, and initiatives must be addressed to the designated responsible employee rather than the original sender.
Attention! A good practice is to notify the responsible persons in advance and include them in the recipients list, at least in the Cc, of all messages that require their attention.
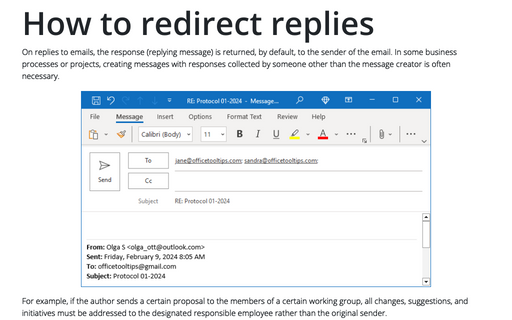
In Outlook, you can find the ability to send a response to a message you are creating to another email address. The recipient won't know that you have chosen to redirect replies to another address until they click the Reply button and see a different email address shown in the To field:

In addition to setting up to reply to a specific message, Outlook allows you to set up an email address to redirect all messages received from that mailbox to a specified address (see how to do that in Outlook for Microsoft 365 and in Outlook for Web). This feature is useful for technical addresses that send only special messages, such as notifications about the opening of a support ticket, the receipt of a request in the site's processing queue, etc., where all incoming messages should be automatically forwarded to the address of the responsible employee. In addition, such settings are useful when an employee goes on vacation, sick leave, etc.
Of course, you can also create a special rule for this.
Handling replies for an email message
To re-direct replies for the message, open the Properties dialog box by doing one of the following:
- If you use the Simplified ribbon (see more about customizing ribbons):
- On the Options tab, click the Direct Replies To button (if you don't see these elements on the ribbon, click the More commands button - three points to the very right of the ribbon buttons):

- Click the dialog box launch button in the lower right corner of the Tracking groups of the Options tab:

Note: If you don't see it on the ribbon, click the More commands button - three points to the very right of the ribbon buttons, then choose Message Options...:
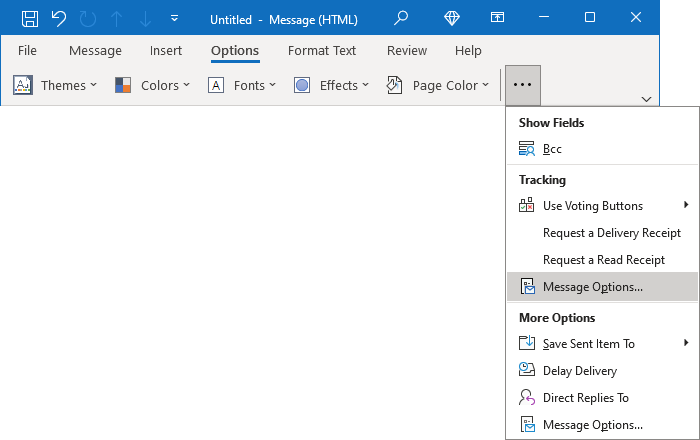
- On the Options tab, click the Direct Replies To button (if you don't see these elements on the ribbon, click the More commands button - three points to the very right of the ribbon buttons):
- If you use the Classic ribbon:
- On the Options tab, in the More Options group, click the Direct Replies To button:

- Click the dialog box launch button in the lower right corner of the Tags group of the Message tab or the Tracking or More Options groups of the Options tab:
 or
or

- On the Options tab, in the More Options group, click the Direct Replies To button:
- On the File tab, click the Properties button:
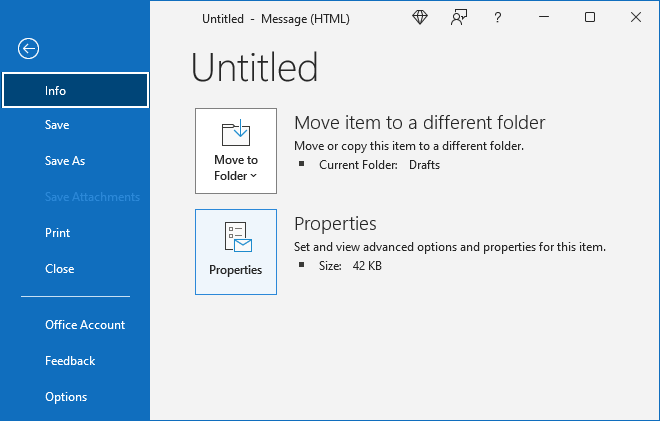
In the Properties dialog box, under Delivery options:

- Select the Have replies sent to checkbox,
- Do one of the following:
- In the Have replies sent to text box, replace the proposed address (the address used by default or the one you choose or type on the From field) with the name or email address of the person to whom you want direct replies sent.
Note: If you need to type more than one address, type them separated by semicolons:

Unfortunately, this dialog box does not allow you to validate the addresses you enter in a manner similar to the Check Names button. Therefore, it is recommended that you enter full addresses or aliases that you are sure Outlook will recognize uniquely. To verify the addresses or names that you enter, you can reopen this dialog box after you close it to make sure that all of the addresses that you entered are recognized - Outlook underlines all of the addresses that it recognizes:

- Click the Select Names... button to open the Global Address Book to choose a name (names) from there.
Note: Outlook is trying to open the Global Address Book. This feature is not available for non-Exchange email accounts. So, Outlook displays a warning message:

You can click OK and select the address book you want to use:

- In the Have replies sent to text box, replace the proposed address (the address used by default or the one you choose or type on the From field) with the name or email address of the person to whom you want direct replies sent.
Specify the reply e-mail address in Outlook for Windows
To set up any replies to the message to go to another account for non-Outlook Exchange email addresses, do the following:
1. Click the File tab in Outlook to open the Account Information pane.
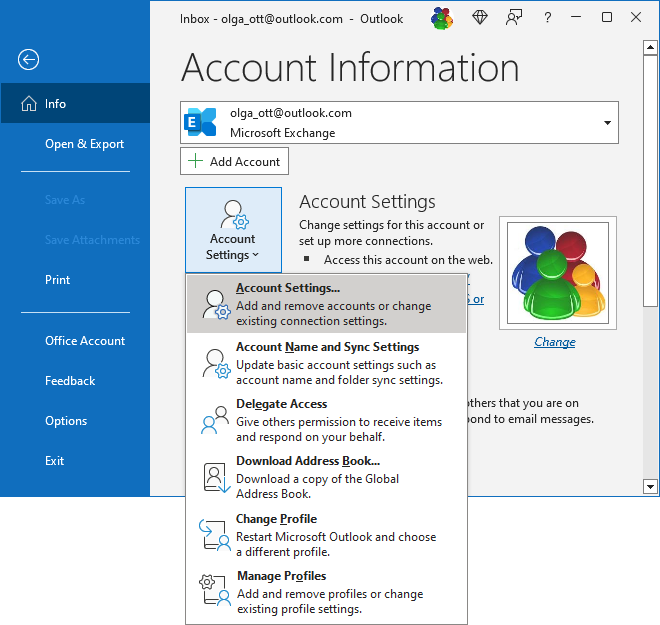
2. In the Account Information pane, click the Account Settings button, then choose Account Setting...:
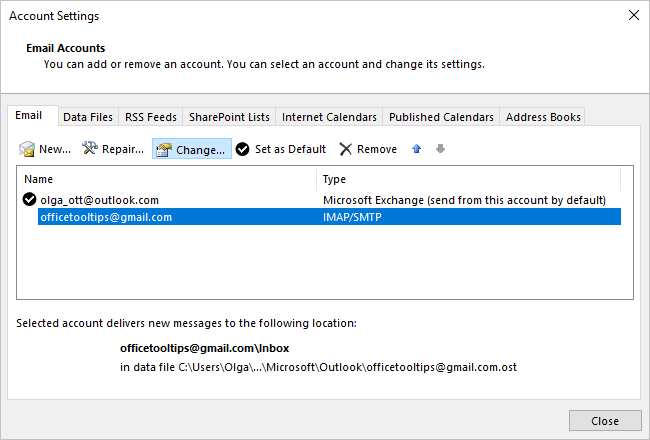
3. In the Outlook Account Settings dialog box, select the email account you want to change, then click the Change... button:
4. In the POP / IMAP Account Settings dialog box, in the Reply-to address field, type the address you want to use for redirecting, then click the Next button:

Note: To stop forwarding the replies, in the POP / IMAP Account Settings dialog box, clear the Reply-to address field (or copy your address).
Specify the forwarding e-mail address in Outlook for Web
To configure the forwarding address for Outlook Exchange addresses, open the Settings dialog box by doing one of the following:
- Click on the
 Settings button in the upper right corner of the page:

or
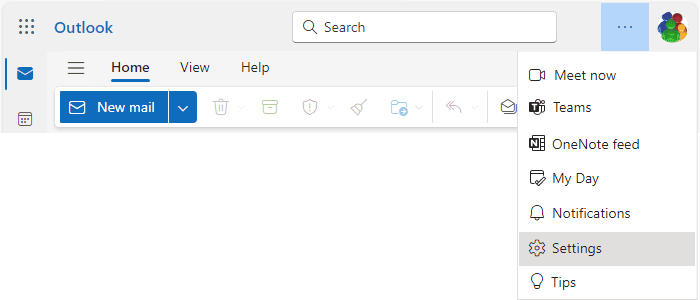
- On the View tab, click the Settings button:

In the Settings dialog box, on the Mail tab, in the Forwarding group:
- Select the Enable forwarding option:

- In the Forward my email to text field, enter the forwarding email address,
- Optionally, select the Keep a copy of forwarding messages checkbox to create a copy of the original message in your mailbox:

- Click the Save button to save changes.
Note: To turn off forwarding, clear the Enable forwarding option and click the Save button.
