How to archive folder items in Outlook
Archiving in Outlook reduces the size of mailboxes and mail folders by moving old items to a local archive data file called a PST file (e.g., archive.pst). Global AutoArchive settings apply to the entire account (see how to customize the AutoArchive feature for Outlook), but you can define a more precise policy for some folders.
The Archive button in Outlook
To move one currently selected Outlook item to an archive (archive folder), do one of the following:
In Outlook for Windows:
- If you use the Simplified ribbon (see more about customizing ribbons), on the Home tab, click the Archive button:

- If you use the Classic ribbon, on the Home tab, in the Delete group, click the Archive button:
 or
or

- Right-click the selection and choose Archive... in the popup menu:
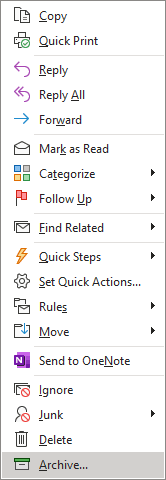
- Press the Backspace key on the keyboard.
In Outlook for Web:
- If you use the Simplified ribbon (see more about customizing ribbons), on the Home tab, click the Archive button:

- If you use the Classic ribbon, on the Home tab, in the Delete group, click the Archive button:

- Right-click the selection and choose Archive in the popup menu:
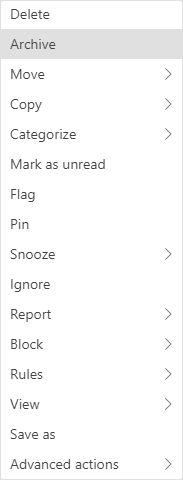
This button moves the selected item to the Archive folder. This command does not actually move an email into an external Archive folder - this is a folder created by Microsoft 365 along with the Inbox, Drafts, Outbox, etc. In fact, no archiving occurs. In the same way, you can move the selected item to any other folder.
For example, using the Move button in Outlook for Windows:
- In the Simplified ribbon, located next to the Archive button:

- In the Classic ribbon, in the Move group:
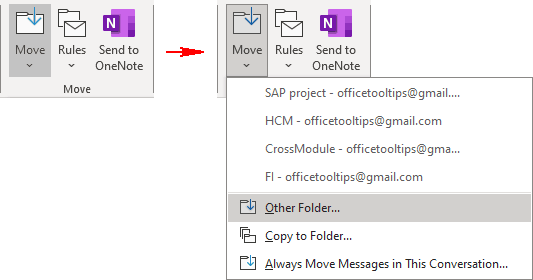
Note: The dropdown list displays the most recently used folders to move.
- Press Shift+Ctrl+V to open the Move Items dialog box and choose the folder where you prefer to move the selected element:
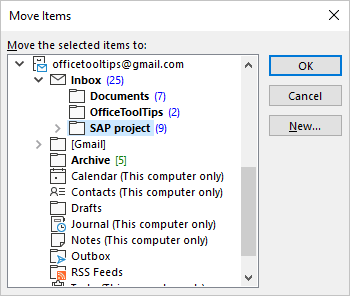
Thus, the Archive button is used to organize email items but not for archiving. If you don't use the additional data files, you can still view the Archive folder's contents through:
- Outlook for Windows:

- Outlook for Web:
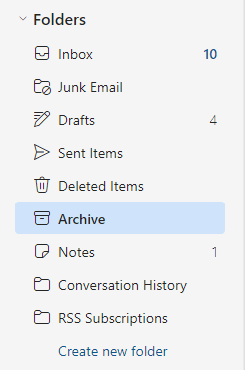
- and the Outlook mobile apps.
- Outlook for Windows:
Customize AutoArchive options for an individual folder
To customize AutoArchive features for the specific folder, do the following:
1. Do one of the following:
- Right-click on the particular folder and choose Properties... in the popup menu:
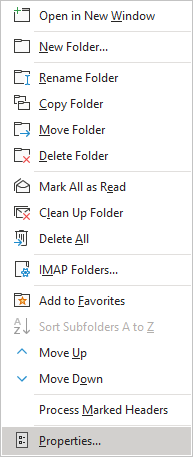
- On the Folder tab (available only for the Classic ribbon - see how to customize ribbons), in the Properties group, click the AutoArchive Settings button:

2. In the Properties dialog box, choose the AutoArchive tab:
- Select the Do not archive items in this folder option to exclude this folder from any archiving options that are set.
- Select the Archive items in this folder using the default settings to use the default archiving options for this folder. To see or change the AutoArchive features set up for all folders, click the Default Archive Settings... button:

In the AutoArchive dialog box, you can see or modify the setting that applies to all folders in this Outlook application (see how to customize AutoArchive feature in Outlook for all folders):

- Select the Archive this folder using these settings option to set different AutoArchive options for this folder only. For example:

- In the Clean out items older than field, select how old the items must be before they can be archived using this option:
- In the text field, type or select the number between 1 and 99 to determine the duration,
- From the dropdown list, select the unit of measurement: days, weeks, or months:

- Select the Move old items to default archive folder option to use the default setting for the AutoArchive feature:
By default, the archive file is named archive.pst and located in the default Outlook location:
C:\Users\
<user_name>\ Documents\ Outlook Files\ archive.pst See more about default AutoArchive settings.
- Select the Move old items to option to specify the path and the name of an archive file (.pst or PST file) for this folder. In the text box, you will see the path and name of the archive file used by default:

Type or select the location of the specified archive file for this folder by clicking the Browse... button. In the Find Outlook Data Files dialog box, select the location and name for the file:
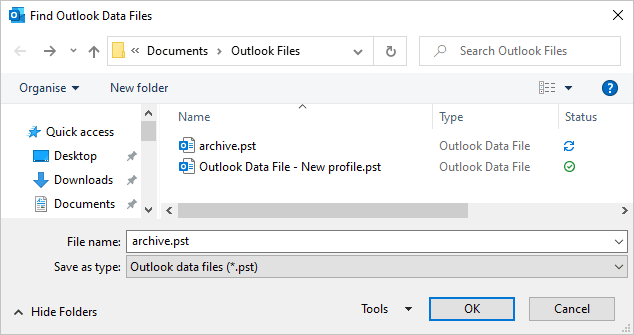
See how to create and use the data files in Outlook for more details.
- Select the Permanently delete old items option to tell Outlook that all old items from this folder are no longer needed. For example, it will be a good choice for the Deleted Items (Trash) or Junk folders.
Notes:
- You will need to repeat this process for each folder you want to clean automatically if its items need to be placed in a different archive file than the default one.
- The Archive folder is stored locally on your computer. It and its elements will not be saved to the cloud and unavailable on your phone apps.
Configure an Outlook email message not to be archived in Outlook
To mark some Outlook message, open the Properties dialog box (see below how to open the Properties dialog box for a newly composed message or a received one).
In the Properties dialog box, under Settings, select the Do not AutoArchive this item checkbox:
- For a new message in Outlook:

- For a received message:

Open the Properties dialog box for a new compose message:
- If you use the Simplified ribbon (see more about customizing ribbons), on the Options tab, click the dialog box launch button in the lower right corner of the Tracking group:

Note: If you don't see it on the ribbon, click the More commands button - three points to the very right of the ribbon buttons, then choose Message Options...:
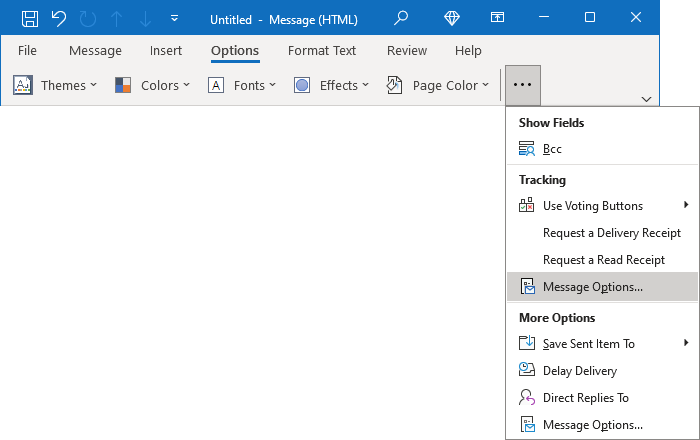
- If you use the Classic ribbon, click the dialog box launch button in the lower right corner of the Tags group of the Message tab or the Tracking or More Options groups of the Options tab:
 or
or
 or
or

- On the File tab, click the Properties button:
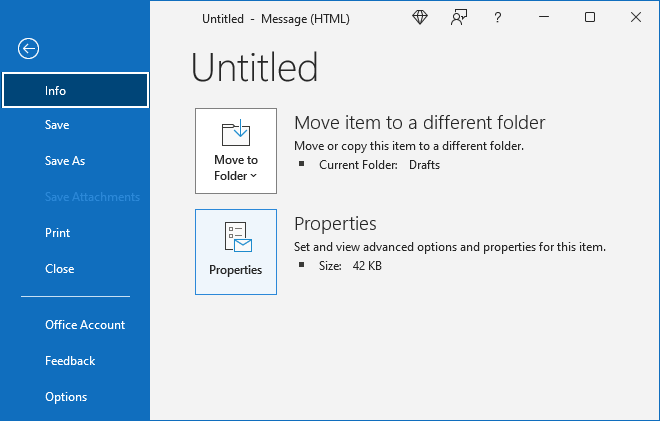
Open the Properties dialog box for a received message:
- If you use the Simplified ribbon (see more about customizing ribbons), click the dialog box launch button in the lower right corner of the Tags group of the Message tab:

- If you use the Classic ribbon, on the Message tab, in the Tags group, click the dialog box launch button in the lower right corner:

- On the File tab, click the Properties button:
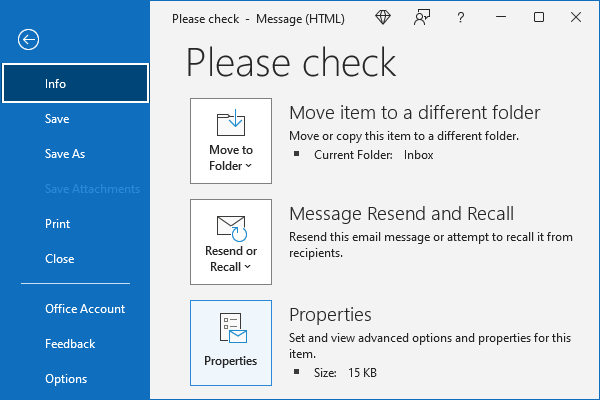
See also this tip in French: Comment personnaliser le dossier d'archivage automatique.

