Set page margins
Excel
365
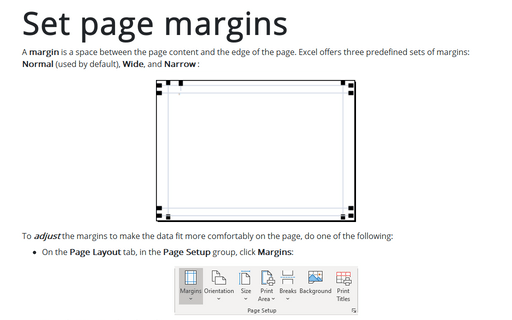
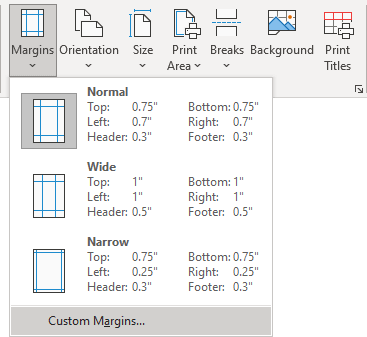
A margin is a space between the page content and the edge of the page. Excel offers three predefined sets of margins: Normal (used by default), Wide, and Narrow :

To adjust the margins to make the data fit more comfortably on the page, do one of the following:
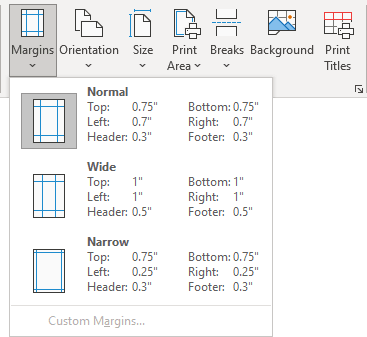
- On the Page Layout tab, in the Page Setup group, click Margins:

Form the Margins dropdown list, select one of the proposed options:
- On the File tab, click Print (or click Ctrl+P):

On the Print pane, under Settings, from the Margins dropdown list, select the option you need:
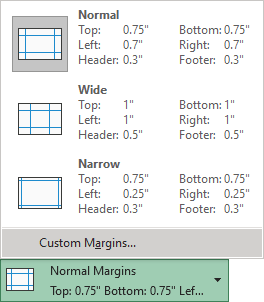
Note: To set the custom margins, click the Custom Margins... option. See how to set custom margins below.
The margins will be changed to the selected size.
Set custom margins
To customize the size of the margins, follow the next steps:
1. Do one of the following:
- On the Page Layout tab, in the Page Setup group, click Margins, then select Custom Margins... from the drop-down list:
- On the Page Layout tab, in the Page Setup group, click the dialog box launcher:

- On the File tab, click Print (or click Ctrl+P). On the Print pane, under Settings, from the Margins dropdown list, select Custom Margins...:

2. In the Page Setup dialog box, on the Margins tab:
- In the top section, adjust the values for each margin, including the margins for headers and footers
- In the Center on page area, select the option you prefer:

- Horizontally 
- Vertically 
- Horizontally and Vertically 
- Click OK.
Note: It is impossible to change the default page margins for new workbooks in Excel.
