How to change flowchart connector or flowline
I there are no strict requirements, you can employ different types and styles of connectors (also known as flowlines) that represent semantically different transitions.

Change the connector or flowline type
To change the connector type, it is not necessary to take several steps like changing shape (see How to change flowchart shapes in Excel); you just need to:
1. Select the connector you want to change:

2. Right-click on the connector, then in the popup menu, from the Connector Types list, choose the connector type you prefer:

See more about different connector or flowline types.
Excel changes the connector type:

See also How to add text to the connector.
Reroute the connector or flowline
To change the direction of the connector arrow, select the connector (or several connectors) you want to reroute, then do one of the following:
- On the Shape Format tab, in the Insert Shape tab, click the Edit Shape button. From the Edit Shape dropdown list, select Reroute Connectors:
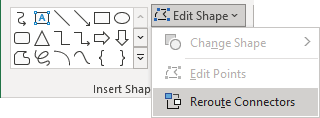
- Right-click the selection, then click Reroute Connectors in the popup menu:

Change the connector or flowline style
To apply a connector or flowline fill formatting, select it, then do one of the following:
- Apply any of the predefined styles from the Styles gallery,
- Use commands on the ribbon tab or the Format pane:
Like many Microsoft Office features, commands for object formatting are duplicated on Format tabs and Format panes (see how to open the Format pane below). The most frequently used commands are on the tabs, but the complete set is on the appropriate pane.
- Add and modify different effects such as shadow, reflection, glow, 3-D rotation, etc.,
- Modify the color with a solid color, a color gradient, a texture, a pattern, etc.
Apply predefined line style
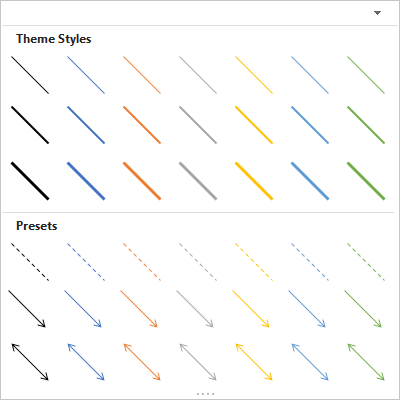
To apply a predefined style for the selected connector, on the Format Shape tab, in the Shape Styles group, choose any of the predefined styles from the gallery:

To see more styles, click the More button next to the gallery:

Excel opens the full gallery of the predefined styles for lines:
Connector or flowline formatting using the ribbon tab
To apply an outline formatting for the selected connector, on the Format Shape tab, in the Shape Styles group, click the Shape Outline dropdown list, then do any of the following:
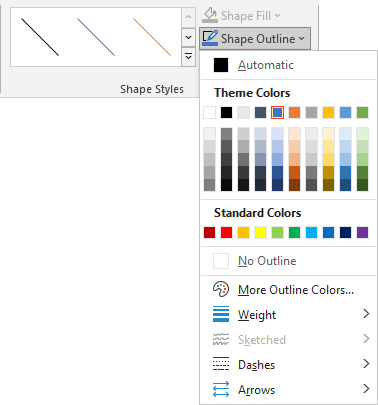
- Select a different color from the Theme Colors palette. Colors in this palette depend on the current Theme.
- Select one of the 10 standard colors available in all Microsoft documents in the Standard Colors palette, regardless of the theme. The colors in this palette are the same on all computers.
- Select any non-standard colors you have used recently if there are any in the Recent Colors palette.
- Select the No Outline check box to hide the connector.
- Click More Outline Colors... to use non-theme colors (see how to apply a solid color for more details).
- From the Weight list, select the line weight you prefer:
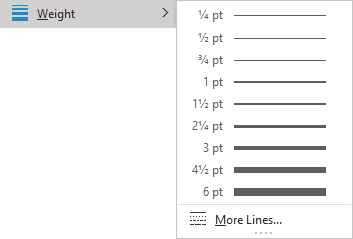
Or select More Lines... to open the Format pane with more options for outline width, compound type, etc.
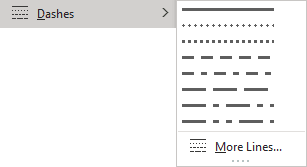
- From the Dashes list, select the desired dash type, or click More Lines... to open the Format pane with more options:
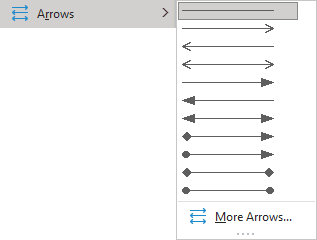
- From the Arrows list, select the style you prefer, or click More Arrows... to open the Format pane:
Connector or flowline formatting using the Format pane
To change the style of the selected connector, do the following:
1. Right-click the selection and choose Format Shape... in the popup menu:
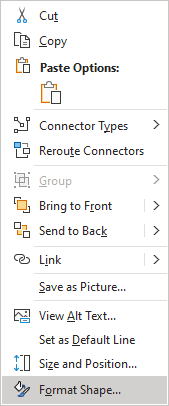
2. On the Format Shape pane, on the Fill & Line tab, in the Line group:
- The No line option hides an object border.
- The Solid line option contains the following options:
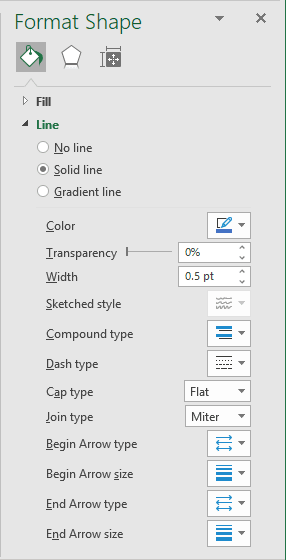
- The Color and its Transparency - see how to apply a solid color,
- The Width of the border,
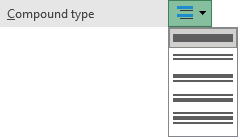
- The Compound type list contains a predefined set of parallel lines that comprise the overall line and their relative thicknesses:
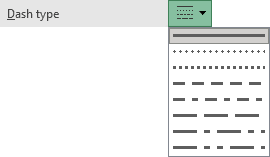
- The Dash type list contains the predefined styles of a line (solid, dashed, dotted, etc.):
- The Cap type list allows coosing one of the styles for the ends of the line (applicable to lines only):

- The Join type list allows choosing the style for the corners:

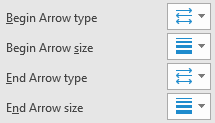
- The Arrow settings contain different variants for types and sizes of the arrow heads (applicable to lines only):
- The Gradient fill option allows creating a gradient fill.
See how to work with gradients for more details.
See also this tip in French: Comment changer le type de connecteur pour un diagramme.

