Snap an object to the Grid or to a Shape
Word
365
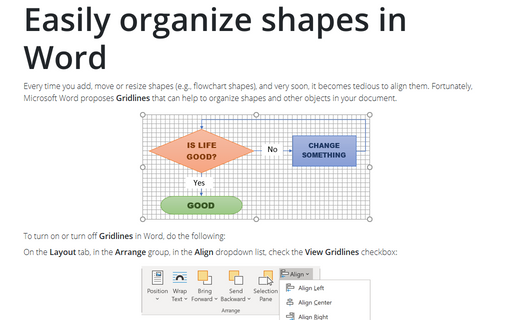
By default, Word makes objects snap (jump) to an underlying grid laid across the document. If you drag an
object, such as a shape, you'll notice that it moves in little jerks rather than smoothly. This is because
of the grid - but because the grid is usually invisible, it's not obvious.

To configure the grid, or to turn off snapping, follow these steps:
1. Select a shape. Word displays the Shape Format tab.
2. On the Shape Format tab, in the Arrange group, choose the Align drop-down list:

In this list click the View Gridlines if you want to turn on the display of the grid:

3. On the Shape Format tab, in the Arrange group, choose the Align drop-down list. In this list click the Grid Settings... to display the Grid and Guides dialog box:

- Select the Snap objects to other objects checkbox if you want to make an object you're dragging snap to another nearby object. This feature lets you create multiobject drawings more quickly and is usually helpful.
- In the Grid settings area, you can use the Horizontal spacing text box and the Vertical spacing text box to change the size of the grid's rectangles.
- In the Grid origin area, select the Use margins checkbox if you want the grid to start at the document's margins. If you need to position objects in the margins, clear the Use margins checkbox, and then set the horizontal starting position for the grid in the Horizontal origin text box and the vertical starting position in the Vertical origin text box.
- Choose settings in the Show grid area:
- Display gridlines on screen - Select this checkbox if you want to see gridlines onscreen. Seeing them can be helpful for positioning objects, but they tend to make working with text hard.
- Vertical every - Select this checkbox if you want to see vertical gridlines. In the text box, specify the number of vertical grid intervals between displayed lines.
- Horizontal every - In this text box, specify the number of horizontal grid intervals between displayed lines.
- Snap objects to grid when the gridlines are not displayed - Select this checkbox if you want Word to snap objects to the grid even when you can't see the gridlines.
- If you want to make these grid settings the default for the current template, click the
Set As Default... button, and then click Yes in the confirmation dialog box:

See also this tip in French: Aligner un objet sur la grille ou sur une forme.

