How to show/hide nonprintable symbols in a Word document
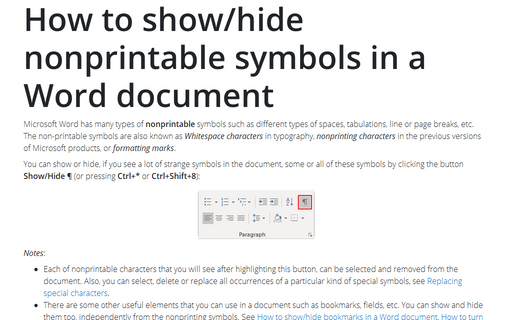
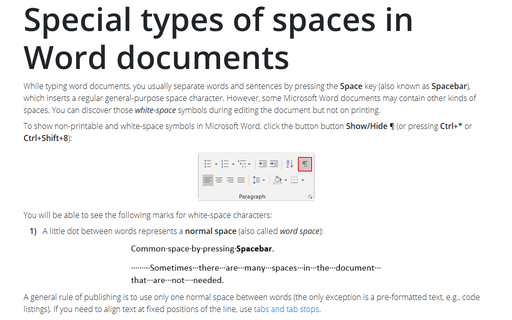
You can show or hide, if you see a lot of strange symbols in the document, some or all of these symbols by clicking the button Show/Hide ¶ (or pressing Ctrl+* or Ctrl+Shift+8):

Notes:
- Each of nonprintable characters that you will see after highlighting this button, can be selected and removed from the document. Also, you can select, delete or replace all occurrences of a particular kind of special symbols, see Replacing special characters.
- There are some other useful elements that you can use in a document such as bookmarks, fields, etc. You can show and hide them too, independently from the nonprinting symbols. See How to show/hide bookmarks in a Word document, How to turn on or turn off highlighting off fields in a Word document.
You can selectively show only spaces in the document, only Tabulation symbols, etc. To show or hide specific nonprintable symbols, do the following:
1. On the File tab, click the Options button:

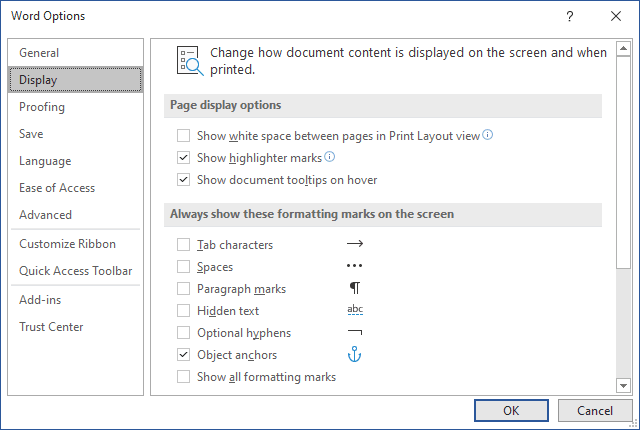
2. In the Word Options dialog box, open the Display tab and then check or uncheck options as you like:

- Tab characters or Tabulations: If you check this checkbox, all tabulations
will be shown as an arrow symbol (→):

See A perfect text alignment using tabs and Setting tabs using the Tabs dialog box.
- Spaces can differ:
- When you type the text, usually you separate words (sentences or even syllables in
some languages) by pressing the Space key (also known as Spacebar).
Usual or common space is shown as a little dot between words:

- To keep words together, can a Nonbreaking space (also called
non-breaking space, no-break space,
non-breakable space (NBSP), hard space, or
fixed space) be used. A Nonbreaking space in the Word document
looks like a degree symbols between words:

See How to keep two or several words together in a document Word.
- Sometimes more specific spacing characters like Em Space, En Space or
¼ Em Space are used.
These spaces distinguish by their width:
- Em space means a space the same width as a lowercase m character.
- En space means a space the same width as a lowercase n character.
- ¼ Em space (also known as mid space) accordingly means a space the same width as a lowercase m character divided by 4 - one fourth of an Em Space wide.
Em space and En space are shown as common space, as a little dot between words, but with wider gaps before and after them. ¼ Em Space looks like a vertical bar between words:

- When you type the text, usually you separate words (sentences or even syllables in
some languages) by pressing the Space key (also known as Spacebar).
- Paragraph marks or pilcrows (¶) represent a paragraph break.
They are inserted by Word at the end of every paragraph. In other words, it appears every time when you press Enter:

Notes:
- As you can see in the example above, many of emails are formatted incorrectly. See How to remove paragraph symbols for every line in Word.
- The paragraph mark ¶ contains all the paragraph formatting. To copy all paragraph
formatting, you can select this symbol, copy it, and then paste it into another
paragraph. The last ¶ in the document contains formatting for the last section of the
document, or for entire document if it contains just one section.
See How to copy paragraph or numbering format without changing the text format and How to do anything with paragraph format with keyboard.
- Hidden text can be used in any Word document because it is a pre-defined format like
Italic or Bold. It isn't necessary to do something extra to add hidden text.
Hidden text is shown with a dotted underline:

See Check the document for hidden information and 11 Shortcut Keys to control font format.
Notes: In contrast of other nonprinting characters, hidden text can be printed. See How to see/show a hidden text in a Word document and How to print a hidden text in a Word document.
- Optional hyphens are used to break specific lines of text.
They are shown as ¬.
For example, if a lengthy word wraps to the next line and leaves a large amount of white space, you can insert an optional hyphen in that specific word so that the first part appears on the first line. If the word later moves to a different position because of editing, the optional hyphen does not print. If further editing moves the word back into a hyphenation zone, the hyphen reappears:

- Object anchors are shown in a document just when you select an object.
Any floating object in a document has an anchor that is tied to a particular paragraph
 . It can be moved, replaced or
removed with that paragraph like its part.
. It can be moved, replaced or
removed with that paragraph like its part.It is possible to move any anchor to any other paragraph.
- The Show all formatting marks checkbox mirrors the button Show/Hide ¶ that was described above. When you click to highlight that button on the ribbon or non-highlight it (or use shortcut keys for that), that checkbox will be checked or unchecked appropriately.
Other formatting marks that you can see in the document by clicking on the Show/Hide ¶ button:
- Line breaks:
a) As a right-angle arrow pointing to the left
 . This symbol can be added
to the document to start a new line, not a new paragraph, by clicking on
Shift+Enter:
b) As a right-angle arrow between two vertical lines
 . This symbol shows the
break that separate text around object, such as a caption text or an image from the body
text.
- Pagination breaks - a Column break, a Page break and a Section break
are used for the better formatting of the document:


To add the page break, just click Ctrl+Enter.
- Keep marks are shown as a small black bullet ■ on the margin next to the paragraph:

Keep marks represents some of paragraph options:
- Keep with next,
- Keep lines together,
- Page break before.
See How to keep lines and paragraphs together in a Word document for more details.
You can open the Paragraph dialog box and see keep marks by double-clicking on the appropriate keep mark.
- End-of-cell and End-of-row marks that you can see in tables as universal
monetary symbol or currency sign (¤) looks like a circle with four lines
radiating from the corner:

End-of-cell marks like a paragraph marks contain formatting for the last (or only) paragraph in the cell and formatting for the cell.
End-of-row marks placed at the end of each row of a table. They contain formatting for the row.
Notes:
- You can show or hide all these special symbols, but they are still non-printable! You can print just some of them.
- To delete any of these special characters, select them and press the Delete key.
- Displaying of these special characters is very helpful for troubleshooting. If your text
doesn't break as you like, it can be because you have too many (or the wrong) paragraphs set
as Keep with next.
If your printer is adding a blank page at the end of your document, it could be because of several empty paragraphs at the end that are forcing an extra page.
If an automatic number insists on being bold even though you have applied bold formatting only to the part of the numbered paragraph, it can be because of paragraph marks. You need to select the paragraph mark and un-bold it, since automatic bullets and numbering take on the formatting of the paragraph mark.
See also this tip in French: Comment afficher / masquer les symboles non imprimables dans le document Word.

