Microsoft Office Themes in PowerPoint
Even a blank presentation has a Theme: the Office theme with a white slide background, a default set of text colors and accents, and an Office font set of Calibri Light for headings and Calibri for body text.
Additionally, PowerPoint offers Variants for most of the Themes.
Note: One presentation can have multiple themes!
A design Theme is a collection of predefined formatting options that includes theme colors, fonts, effects, and background settings. In PowerPoint, all Themes displays in the Themes gallery on the Design tab in the Themes group:

The Themes gallery displays thumbnails for each Theme. Each thumbnail represents:
- A sample of the Font set in the form of an uppercase and lowercase letter A (Aa),
- A Colors set in the form of colored blocks at the bottom,
- A background graphics that set the tone of the title slide.
To see the full gallery, use the scroll arrows or click the More button:

The Themes gallery contains:
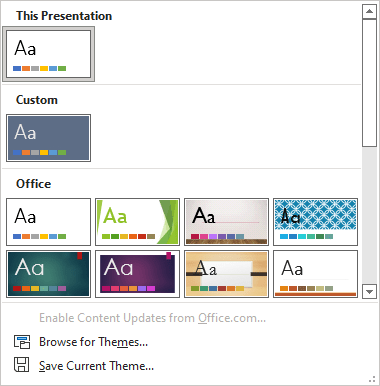
- In the This Presentation area, thumbnails with samples of the used themes,
- In the Custom area, thumbnails for all custom themes found in the Document Theme folder,
- In the Office area, all predefined themes you can apply.
Apply a Theme
In the Normal or Outline view, hover over a Theme thumbnail to display the theme name in tooltips and see a quick preview of how the new theme will change the presentation slide:

Note: In the Slide Sorter view, PowerPoint displays only the theme names in tooltips but not a preview. In the Notes Page view, the Themes group of the Design tab is disabled.
To apply a chosen Theme, do one of the following:
- On the Design tab, in the Themes group, click the Theme thumbnail in the Themes gallery.
This command applies the chosen Theme to:
- All slides in the presentation if it uses only one theme and no slides are selected:

- Slides with the theme of the current slide, if the presentation uses more than one theme and no slides are selected,
- Selected slides:

- All slides in the presentation if it uses only one theme and no slides are selected:
- Right-click on the chosen Theme and select one of the suggested options from the popup menu:
- Apply to All Slides,
- Apply to Selected Slides:

Notes:
- To apply a Theme from a nonstandard location (not located in the Document Theme folder) or from a template file, click the Browse for Themes... option in the Themes gallery:
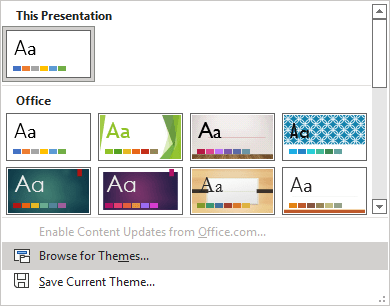
In the Choose Theme or Themed Document dialog box, browse the theme you want to apply or template with the needed theme, then click Open.
- Themes use specific fonts with different font sizes. Thus, some themes can change the appearance of objects, such as shapes, text boxes, and diagrams, as well as shift presentation elements. Therefore, we strongly recommend checking a presentation after applying a new theme.
Apply theme variants
Most themes offer various color variations, which are displayed in the Variants group on the Design tab. For example, variants for the Facet theme:

If you don't see any options in the Variants group for the selected theme, it might be because it is a custom theme, or an older theme designed for earlier versions of PowerPoint:

To see all the proposed variants, if available, use the navigation arrows or click the More button:

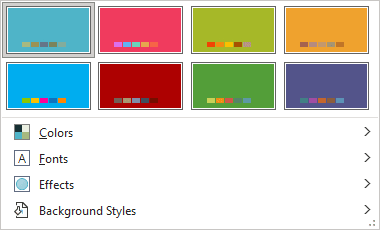
For example, variants for the Metropolitan theme:
Create a Custom Theme
You can customize any of the sets used in the Theme: Colors, Fonts, Effects, and Background Styles. In addition to saving individual settings, it is possible to save the entire customized theme. To do so, after all customization, do the following:
1. On the Design tab, in the Themes group, click the More button to open the Themes gallery, then click Save Current Theme...:
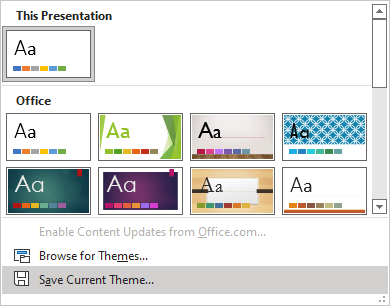
2. In the Save Current Theme dialog box:
- In the File Name field, type a name for the new theme:
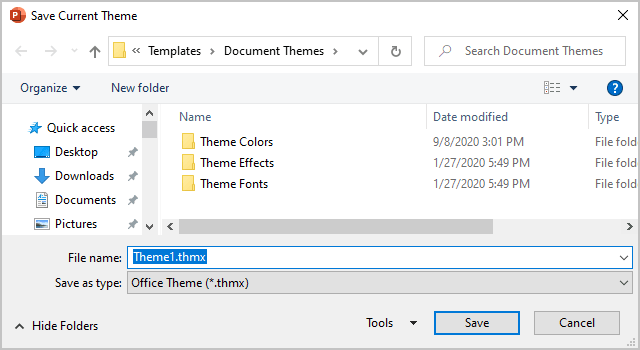
- Click the Save button.
Notes:
- Office Theme (*.thmx) file format is somewhat like a template, but it contains only theme settings (fonts, colors, background style, and effects). This format is useful when you don't want to save any content.
- A custom theme is saved in the Document Themes folder and is automatically added to the Custom sections of the Themes gallery.
The location of the Document Themes folder may vary, but it is usually located here:
C:\Users\
<user_name>\ , where <user_name> is your login name.AppData\ Roaming\ Microsoft\ Templates\ Document Themes
Modify a custom Theme
In fact, you cannot edit a custom Theme. You can simply set up the current Theme (custom or predefined) and save it as a new custom Theme by overwriting the existing file.
Share a custom Theme
A custom Theme is only available to the current user logged in to the PC, tablet, etc. To share it with other users or locations, do the following:
1. Ensure that the customization is saved - you can see the *.thmx file with the custom name you defined for the custom Theme in the Document Themes folder (see where you can find the Document Themes folder).
2. Copy this *.thmx file to another location you need or send it.
Note:
- If you prefer to see the custom Theme in the Themes list, copy a *.thmx file to the correspondent Document Themes folder in the new location.
- If you don't want to see this custom Theme in the Themes list, you can copy a *.thmx file to any location except the Document Themes folder (you will need to use the Browse for Themes... option to apply this Theme).
Delete a custom Theme
To delete a custom Theme, do one of the following:
- In Windows Explorer, open the Document Themes folder, then delete the *.thmx file with the name you have defined for the custom Theme.
- In the Themes list, right-click the custom Theme, then choose Delete... in the popup menu:

Note: If you don't want to delete a custom Theme but don't want it showing up on the Themes list, move the file to a folder outside the Document Themes folder (you will need to use the Browse for Themes... option to apply it).
