AutoFit feature

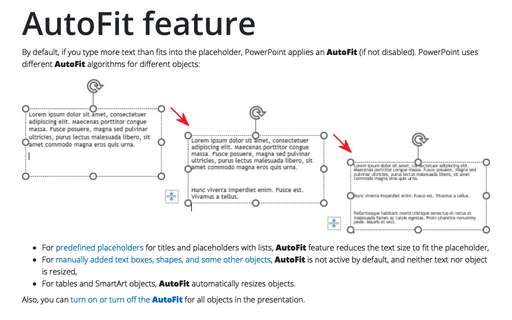
- For predefined placeholders for titles and placeholders with lists, AutoFit feature reduces the text size to fit the placeholder,
- For manually added text boxes, shapes, and some other objects, AutoFit is not active by default, and neither text nor object is resized,
- For tables and SmartArt objects, AutoFit automatically resizes objects.
Also, you can turn on or turn off the AutoFit for all objects in the presentation.
Change AutoFit for an individual placeholder
After making automatic changes, PowerPoint shows the AutoFit Options button on the left of the placeholder:

To change the behavior of the AutoFit feature, do one of the following:
- Click the AutoFit Options button:
- For a title placeholder or a placeholder without numbered or bulleted lists:

- Select the AutoFit Text to Placeholder option to run AutoFit
- Select the Stop Fitting Text to This Placeholder to stop AutoFit for that placeholder
- For a placeholder with numbered or bulleted lists, there are three additional options:

- Select the Split Text Between Two Slides option for automatic moving the second half of the bullet points to a new slide:

- Select the Continue on a New Slide option for creating a new slide with the same layout to continue the bulleted list:

- Select the Change to Two Columns option for displaying the list in two columns on the same slide:

- Select the Split Text Between Two Slides option for automatic moving the second half of the bullet points to a new slide:
- For a title placeholder or a placeholder without numbered or bulleted lists:
- Right-click a placeholder, then choose Format Shape... in the popup menu:
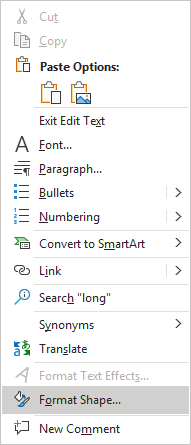
On the Format Shape pane, on the Shape Options tab, in the Size & Properties group, in the Text Box section, select one of the AutoFit options:

- Do not Autofit allows overflowing the placeholder:
- If the Wrap text in shape checkbox is selected (at the bottom of the Format Shape pane, which is selected by default for placeholders), text overflows at the bottom of the placeholder:

- If the Wrap text in shape checkbox is not selected, text overflows at the right of the placeholder:

Note: The selected Wrap text in shape checkbox enables text to automatically wrap to the next line when it reaches the right edge of the placeholder.
- If the Wrap text in shape checkbox is selected (at the bottom of the Format Shape pane, which is selected by default for placeholders), text overflows at the bottom of the placeholder:
- Shrink text on overflow (the default option for predefined placeholders) allows to resize the text size to fit the placeholder:

- Resize shape to fit text (see an example below).
Note: The same options are available on the Text Options tab, in the Textbox group, in the Text Box section.
- Do not Autofit allows overflowing the placeholder:
Change AutoFit for an object
The AutoFit Options icon does not appear even after automatic changes for a shape or a manually added text box. To change the AutoFit options for objects, do the following:
1. Right-click an object, then choose Format Shape... in the popup menu:
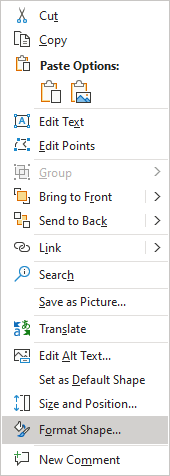
2. On the Format Shape pane, on the Text Options tab, in the Textbox group, in the Text Box section, select one of the AutoFit options:

- Do not Autofit (default option for shapes) - the text and the object do not change sizes, and the text can overflow from the box or be truncated. The Wrap text in shape option is selected by default for:
- Shapes:

- fixed-width text boxes:

- Shapes:
- Shrink text on overflow (the default option for predefined placeholders) - the text can shrink its font size to fit in the box:
- Shapes:

- fixed-width text boxes:

- Shapes:
- Resize shape to fit text (default option for text boxes, chart data series labels) - the text box can enlarge to the size needed to contain the text:
- Shapes:

- fixed-width text boxes:

- Shapes:
Notes:
- The same options are available on the Shape Options tab, in the Size & Properties group, in the Text Box section (see AutoFit for placeholders).
- The Wrap text in shape option is selected by default for manual fixed-width text boxes created by dragging. This option is not selected for manual one-line text boxes created by clicking. See more about creating text boxes.
- AutoFit does not change the font size applied by the Font Size settings.
Turn on or off AutoFit feature
To turn on or turn off an AutoFit feature for all placeholders, do the following:
1. Open the AutoCorrect dialog box by doing one of the following:
- Click the AutoFit Options button, then select Control AutoCorrect Options... in the popup menu:

- On the File tab, click the Options button:

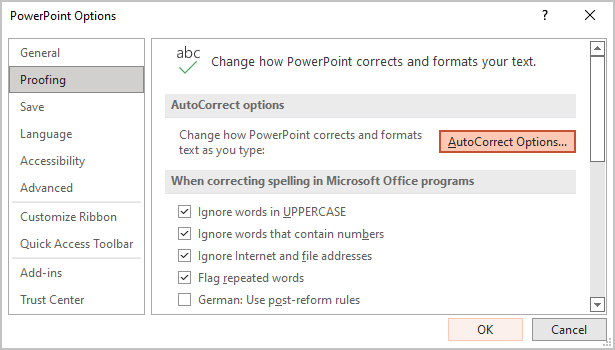
In the PowerPoint Options dialog box, on the Proofing tab, click the AutoCorrect Options... button:
2. In the AutoCorrect dialog box, on the AutoFormat As You Type tab:

- Select the AutoFit title text to placeholder checkbox or the AutoFit body text to placeholder checkbox to automatically fit text to a placeholder,
- Clear the checkbox to stop resizing texts.
