How to make a splendid circular flow chart
SmartArt templates are fine for internal use, but presentations that you create for your customers or partners need a more professional look. Probably, you have seen expensive circular flow charts on the Internet and were thinking of how much you need to spend on the professional designer work. But you don't need to pay extra money to create a splendid circular flow chart.

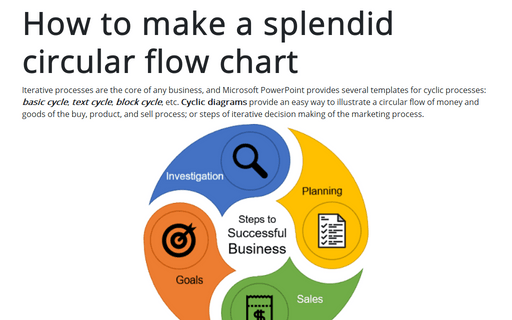
To make a chart like the one above, do the following:
1. Add the base Block Arc shape:
1.1. On the Insert tab, in the Illustrations group, select Shapes:

1.2. In the Shapes list, from the Basic Shapes group, choose the Block Arc shape:
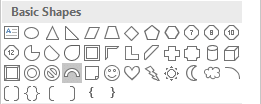
2. Format the Block Arc shape:
2.1. Change sizes for the shape (under Drawing Tools, on the Format tab, in the Size group), for example:

2.2. Change the thickness and format of this shape using yellow points:

3. Add two oval shapes:

For this example, the blue circle diameter is 5.25 cm, and the yellow one diameter is 6 cm.
4. Union and subtract shapes:
4.1. Select blue shapes and under Drawing Tools, on the Format tab, in the Insert Shapes group, choose the Merge Shapes dropdown list and then select Union:
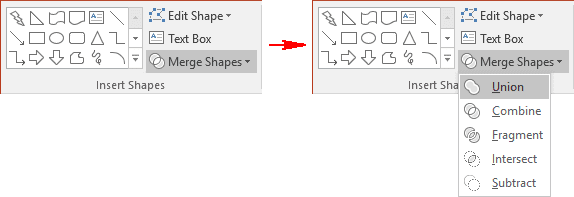
This operation creates a new shape:

4.2. Select the new shape and the yellow circle, then under Drawing Tools, on the Format tab, in the Insert Shapes group, choose the Merge Shapes dropdown list and click Subtract:
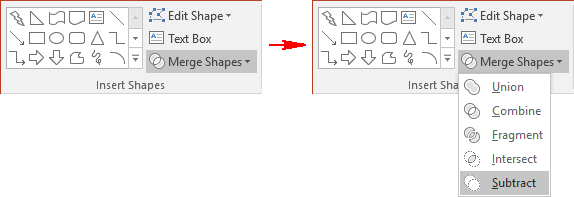
This operation creates another new shape:

5. Add a new oval shape in the center of the new shape.
6. Copy the shape three times and then rotate copied shapes:

To rotate the selected shape, do one of the following:
- Use the rotation handle in the top of the selecting border:

- Under Drawing Tools, on the Format tab, in the Arrange group, select some
commands in the Rotate dropdown list:

7. Add texts and other adjustments for these shapes:

When you enter a text, for some shapes, it might have the wrong direction because of the shape rotation. To change the direction, do the following:
7.1. Right-click on the shape and choose Format Shape... in the popup menu:
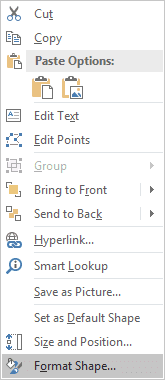
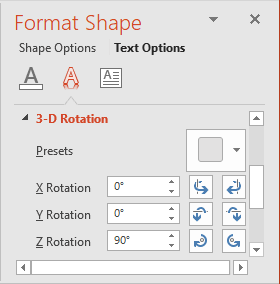
7.2. On the Format Shape pane, on the Text Options tab, in the Text Effect group, in the 3-D Rotation section, choose the appropriate angles of Z Rotation for each shape (90o, 180o, and 270o):
8. Add pictures to the shapes.
See also this tip in French: Comment faire un magnifique diagramme de flux circulaire.
