Move entire column or entire row in Excel
There are two ways how you can move or rearrange an entire column or row in Excel:
- Using the keyboard or ribbon:
1. Insert an empty column (or row) where you want to insert the moved one:
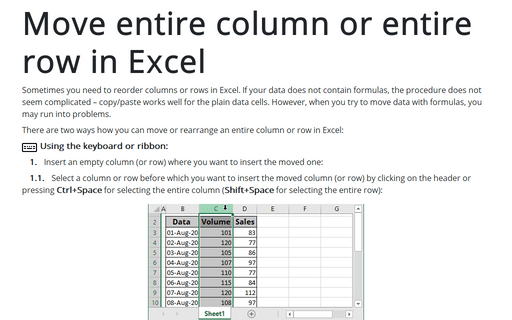
1.1. Select a column or row before which you want to insert the moved column (or row) by clicking on the header or pressing Ctrl+Space for selecting the entire column (Shift+Space for selecting the entire row):

1.2. Do one of the following:
- Right-click on the header and choose Insert from the popup menu:

- On the Home tab, in the Cells group, click the Insert drop-down list. Then click Insert Sheet Columns (or Insert Sheet Rows):

2. Copy the moved column or row to the clipboard by clicking on the Cut button in the Clipboard group on the Home tab or by pressing Ctrl+X:

Excel marks the cut item with the dashed line. For example, the entire column is surrounded by the dashed line:

3. Paste moved data into the inserted empty column or row:
3.1. Select the empty column or row.
3.2. On the Home tab, in the Clipboard group, click the Paste button or press Ctrl+V:

Excel inserts the new column and removes the old one. For example, the entire column:

Note: For the plain data, you can use the Copy (Ctrl+C) instead of Cut (Ctrl+X) and remove the source column later. However, if you have formulas in the moved cells, you need to use the Cut function to keep all the references.
- Using the mouse:
You can simply reorder Excel columns or rows by drag-and-drop their headers. To move rows or columns, do the following:
1. Press and hold the Shift key.
Note: If you don't press and hold the Shift key, the data is replaced by dragging. You can press and hold the Ctrl key to copy the moved data instead of the existing data where you release the move.
2. Point to the border of the selection. When the pointer becomes a Move Pointer ![]() , drag the rows or columns to another location. For example:
, drag the rows or columns to another location. For example:


